Version control integration
Weblate currently supports Git (with extended support for GitHub, Gerrit and Subversion) and Mercurial as version control backends.
Accessing repositories
The VCS repository you want to use has to be accessible to Weblate. With a
publicly available repository you just need to enter correct URL (for example
git://github.com/WeblateOrg/weblate.git or
https://github.com/WeblateOrg/weblate.git), but for private repositories the
setup might be more complex.
Weblate internal URLs
To share one repository between different components you can use a special URL
like weblate://project/component. This way, the component will share the VCS
repository configuration with referenced component and the VCS repository will
be stored just once on the disk.
SSH repositories
The most frequently used method to access private repositories is based on SSH. To have access to such a repository, you generate SSH key for Weblate and authorize it to access the repository. Weblate also needs to know the host key to avoid man in the middle attacks. This all can be done in the Weblate administration interface:
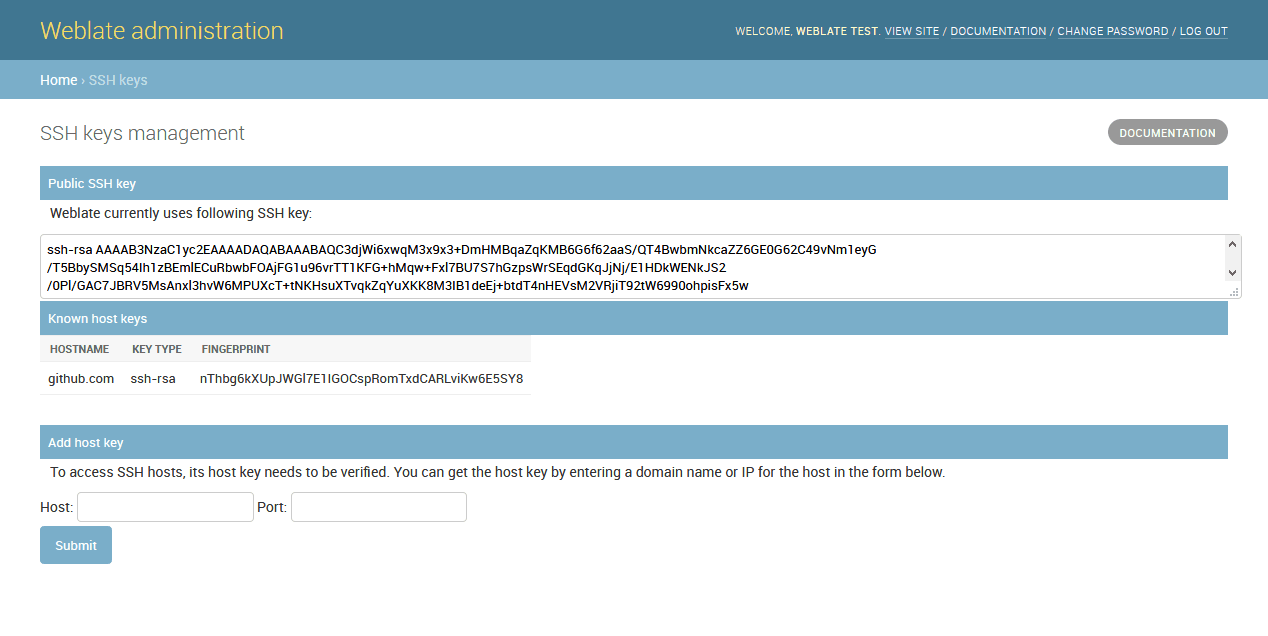
Generating SSH keys
You can generate or display the key currently used by Weblate in the admin interface (follow SSH keys link on main admin page). Once you’ve done this, Weblate should be able to access your repository.
Nota
The keys need to be without password to make it work, so be sure they are well protected against malicious usage.
Advertencia
On GitHub, you can add the key to only one repository. See the following sections for other solutions for GitHub.
Verifying SSH host keys
Before connecting to the repository, you also need to verify SSH host keys of
servers you are going to access in the same section of the admin interface.
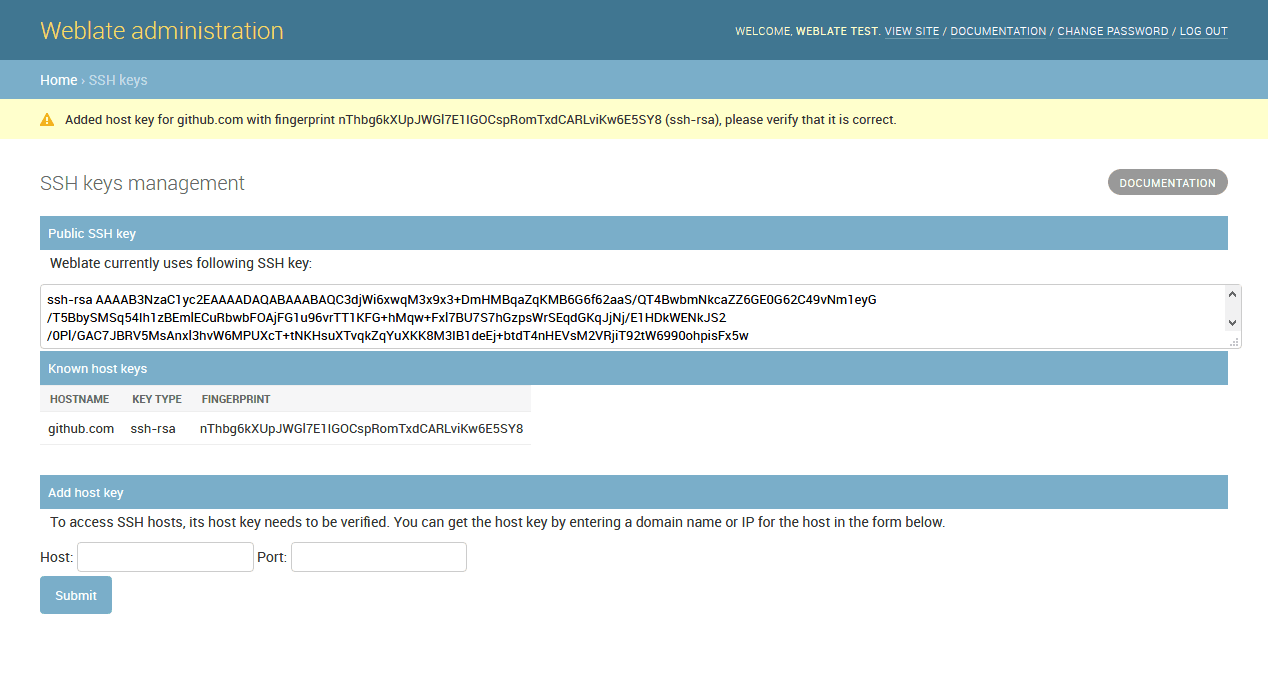
You can do this in the Add host key section. Just enter hostname
you are going to access (eg. gitlab.com) and press Submit.
After adding it please verify that the fingerprint matches the server you’re
adding, the fingerprints will be displayed in the confirmation message:
HTTPS repositories
To access protected HTTPS repositories, you need to include the username and password in the URL. Don’t worry, Weblate will strip this information when showing the URL to the users (if they are allowed to see the repository URL at all).
For example the GitHub URL with authentication might look like
https://user:your_access_token@github.com/WeblateOrg/weblate.git.
Nota
In case your username or password contains special chars, those have to be
URL encoded, for example
https://user%40example.com:%24password%23@bitbucket.org/...`.
Using proxy
If you need to access http/https VCS repositories using a proxy server, you need to configure the VCS to use it.
This can be configured using the http_proxy, https_proxy, and
all_proxy environment variables (check cURL documentation for more details)
or by enforcing it in VCS configuration, for example:
git config --global http.proxy http://user:password@proxy.example.com:80
Nota
The proxy setting needs to be done in the same context which is used to execute Weblate. For the environment it should be set for both wsgi and Celery servers. The VCS configuration has to be set for the user which is running Weblate.
Ver también
Git
Git is first VCS backend that was available in Weblate and is still the most stable and tested one.
Ver también
See Accessing repositories for information how to access different kind of repositories.
GitHub repositories
You can access GitHub repositories by SSH as mentioned above, but in case you need to access more repositories, you will hit a GitHub limitation on the SSH key usage (one key can be used only for one repository). There are several ways to work around this limitation.
For smaller deployments, you can use HTTPS authentication using a personal access token and your account, see Creating an access token for command-line use.
For a bigger setup, it is usually better to create dedicated user for Weblate, assign him the SSH key generated in Weblate and grant him access to all repositories you want.
Git remote helpers
You can also use Git remote helpers for supporting other VCS as well, but this usually leads to other problems, so be prepared to debug them.
At this time, helpers for Bazaar and Mercurial are available within separate
repositories on GitHub: git-remote-hg and git-remote-bzr. You can
download them manually and put somewhere in your search path (for example
~/bin). You also need to have installed appropriate version control
programs as well.
Once you have these installed, you can use such remotes to specify repository in Weblate.
To clone gnuhello project from Launchpad with Bazaar use:
bzr::lp:gnuhello
For hello repository from selenic.com with Mercurial use:
hg::http://selenic.com/repo/hello
Advertencia
Please be prepared to some inconvenience when using Git remote helpers, for example with Mercurial, the remote helper sometimes tends to create new tip when pushing changes back.
GitHub
Nuevo en la versión 2.3.
This just adds a thin layer on top of Git to allow push translation changes as pull requests instead of pushing directory to the repository. It currently uses the hub tool to do the integration.
There is no need to use this to access Git repositories, ordinary Git works the same, the only difference is how pushing to a repository is handled. With Git changes are pushed directly to the repository, while GitHub creates pull requests.
Pushing changes to GitHub as pull request
If you are translating a project that’s hosted on GitHub and don’t want to push translations to the repository, you can have them sent as a pull request instead.
You need to configure the hub command line tool and set
GITHUB_USERNAME for this to work.
Ver también
GITHUB_USERNAME, Setting up hub for configuration instructions
Setting up hub
Pushing changes to GitHub as pull request requires a configured hub installation on your server. Follow the installation instructions at https://hub.github.com/ and perform an action with hub to finish the configuration, for example:
# DATA_DIR is set in Weblate settings.py, set it accordingy.
# Is is /app/data in Docker
HOME=${DATA_DIR}/home hub clone octocat/Spoon-Knife
The hub will ask you for your GitHub credentials, retrieve a token and store
it into ~/.config/hub. This file has to be readable by user running
Weblate.
Nota
Use the username you configured hub with as
GITHUB_USERNAME (WEBLATE_GITHUB_USERNAME for the
Docker image).
Gerrit
Nuevo en la versión 2.2.
Adds a thin layer atop Git to allow pushing translation changes as Gerrit review requests, instead of pushing a directory to the repository. Currently uses the git-review tool to do the integration.
Please refer to the Gerrit documentation for setting up the repository with necessary configuration.
Mercurial
Nuevo en la versión 2.1.
Mercurial is another VCS you can use directly in Weblate.
Nota
It should work with any Mercurial version, but there are sometimes incompatible changes to the command line interface which break Weblate.
Ver también
See Accessing repositories for information how to access different kind of repositories.
Subversion
Nuevo en la versión 2.8.
Thanks to git-svn, Weblate can work with subversion repositories. Git-svn is a Perl script that enables the usage of subversion with a git client, enabling users to have a full clone of the internal repository and commit locally.
Nota
Weblate tries to detect Subversion repository layout automatically - it supports both direct URLs for branch or repositories with standard layout (branches/, tags/ and trunk/). See git-svn documentation for more information.
Distinto en la versión 2.19: In older versions only repositories with standard layout were supported.
Subversion Credentials
Weblate expects you to have accepted the certificate upfront and inserted your credential, if needed. It will look into the DATA_DIR directory. To insert your credential and accept the certificate, you can run svn once with the $HOME environment variable set to the DATA_DIR:
HOME=${DATA_DIR}/home svn co https://svn.example.com/example
Ver también