Начало участия в разработке Weblate
Understand the Weblate source code by going through Исходный код Weblate, Фронтэнд Weblate and Внутреннее устройство Weblate.
Starting with the codebase
Familiarize yourself with the Weblate codebase, by having a go at the bugs labelled good first issue.
Запуск Weblate локально
Самый удобный подход к разработке Weblate — это создать собственное виртуальное окружение (virtualenv) для него с редактируемой версией исходного кода, как описано в Установка из исходников.
Clone the Weblate source code:
git clone https://github.com/WeblateOrg/weblate.git
cd weblate
Create a virtualenv:
virtualenv .venv
.venv/bin/activate
Install Weblate (for this you need some system dependencies, see Установка из исходников):
pip install -e .
Установите все зависимости, полезные для разработки:
pip install -r requirements-dev.txt
Запустите сервер разработки:
weblate runserver
Depending on your configuration, you might also want to start Celery workers:
./weblate/examples/celery start
To run a test (see Запуск тестов локально for more details):
. scripts/test-database
./manage.py test
См.также
Запуск Weblate локально внутри Doсker
If you have Docker and docker-compose installed, you can spin up the development environment by simply running:
./rundev.sh
It will create a development Docker image and start it. Weblate is running on
<http://127.0.0.1:8080/> and you can sign in as the user admin using admin
as the password. The new installation is empty, so you might want to continue with
Добавление проектов и компонентов перевода.
The Dockerfile and docker-compose.yml for this are located in the
dev-docker directory.
The script also accepts some parameters, to execute tests, run it with the
test parameter and then specify any test parameters,
for example:
./rundev.sh test --failfast weblate.trans
Примечание
Убедитесь, что ваш контейнер Docker запущен и работает до того как запустить тесты. Вы можете проверить это, выполнив docker ps.
Чтобы вывести логи:
./rundev.sh logs
To stop the background containers, run:
./rundev.sh stop
Running the script without arguments will re-create the Docker container and restart it.
Примечание
This is not a suitable setup for production, as it includes several hacks which are insecure, but they make development easier.
Разработка Weblate c помощью PyCharm
PyCharm is a known IDE for Python, here are some guidelines to help you set up your Weblate project in it.
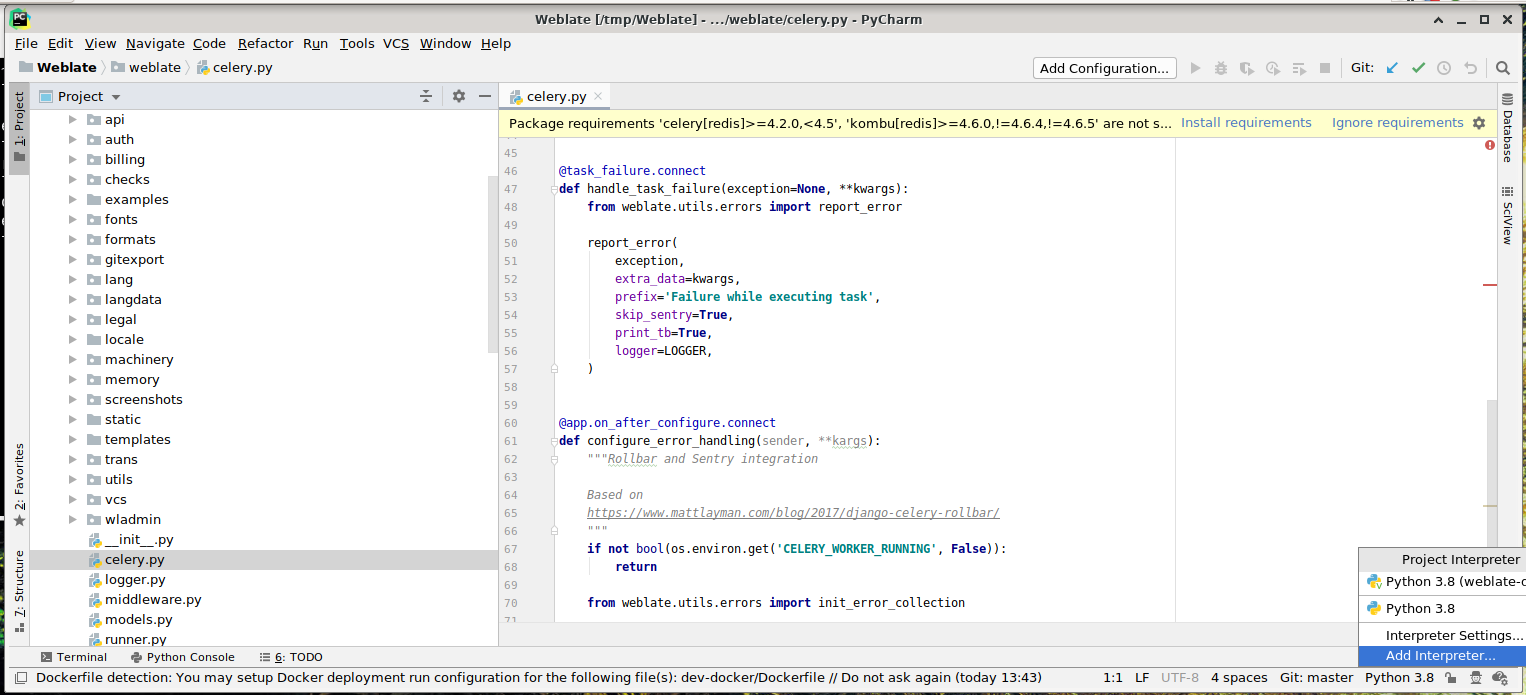
Considering you have just cloned the GitHub repository to a folder, just open it with PyCharm. Once the IDE is open, the first step is to specify the interpreter you want to use:
Вы можете либо позволить PyCharm создать виртуальное окружение за вас, либо выбрать уже существующее:
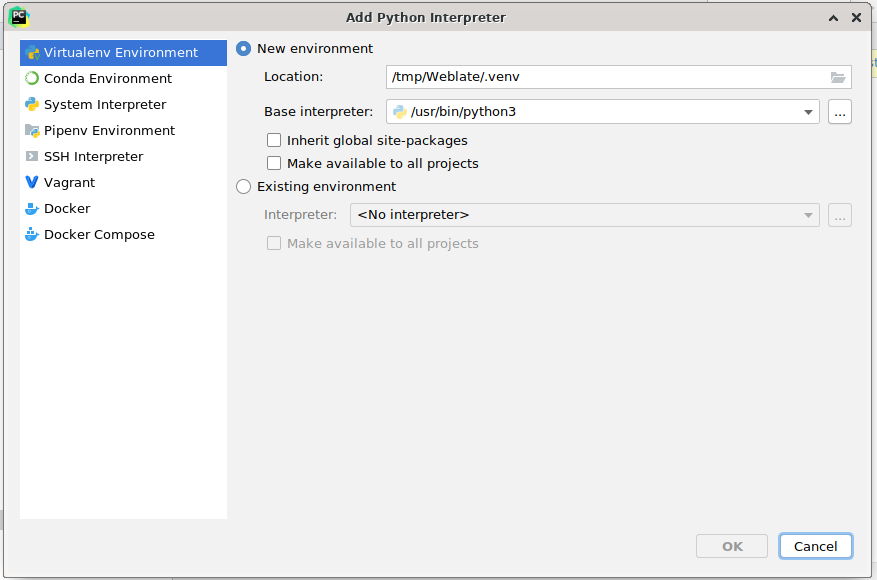
Не забудьте установить зависимости после установки интерпретатора: Либо через консоль (по умолчанию консоль IDE будет напрямую использовать ваш virtualenv), либо через интерфейс, когда вы получите предупреждение о пропущенных зависимостях.
The second step is to set the right info to use Django natively inside PyCharm: The idea is to be able to immediately trigger the unit tests in the IDE. For that you need to specify the root path of the Django project and the path to its settings:
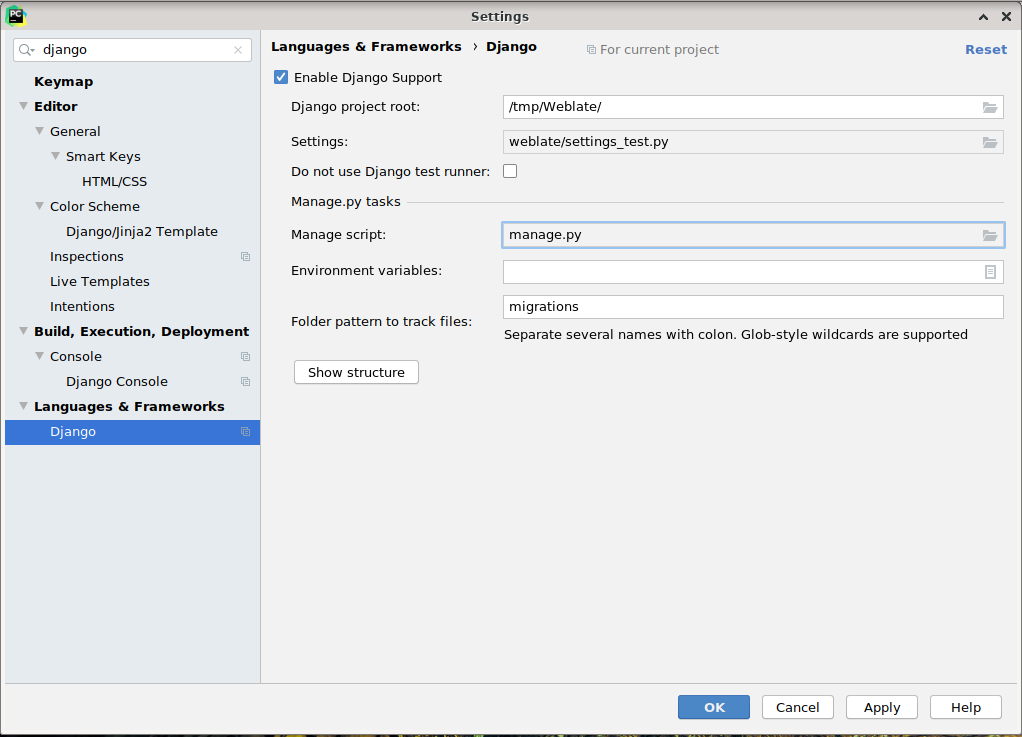
Be careful, the Django project root is the actual root of the repository, not the Weblate
sub-directory. About the settings, you could use the weblate/settings_test.py from the
repository, but you could create your own setting and set it there.
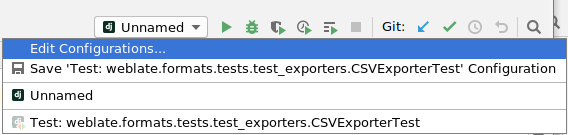
The last step is to run the server and to put breakpoints in the code to be able to debug it. This is done by creating a new Django Server configuration:
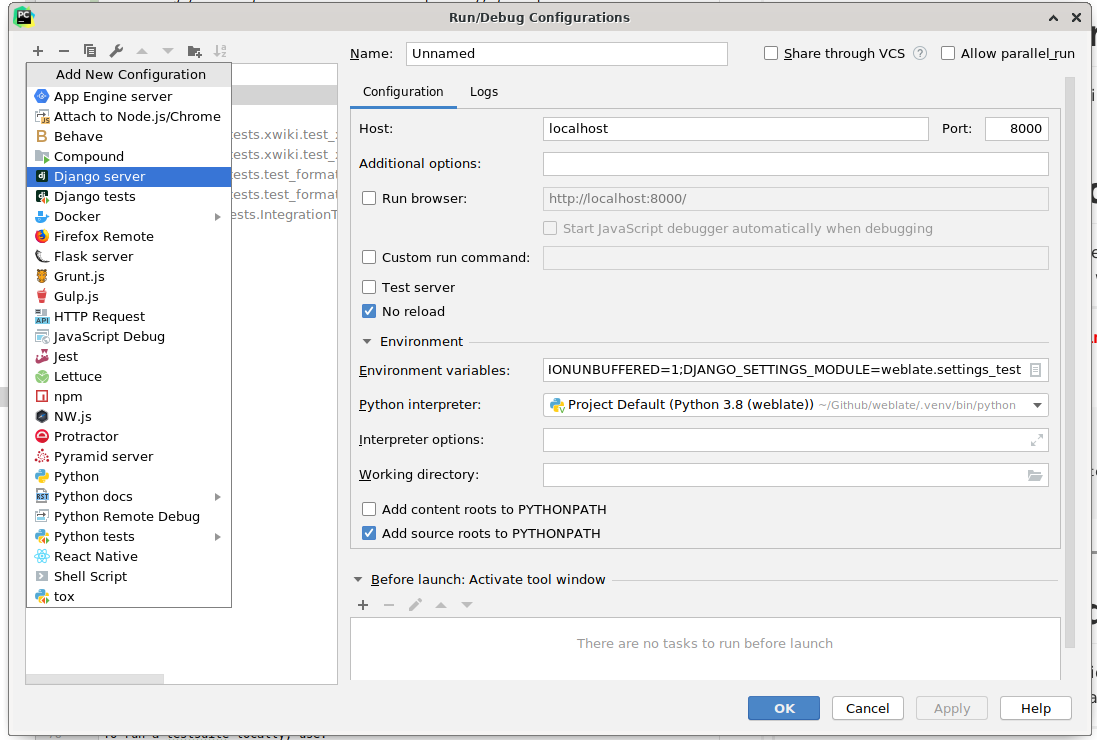
Подсказка
Be careful with the property called No reload: It prevents the server from being reloaded live if you modify files. This allows the existing debugger breakpoints to persist, when they normally would be discarded upon reloading the server.
Bootstrapping your devel instance
You might want to use import_demo to create demo translations and
createadmin to make an admin user.