Weblate kodlarına katkıda bulunmak
Weblate kaynak kodlarını anlamak için lütfen önce Weblate kaynak kodları, Weblate frontend ve Weblate iç yapısı bölümlerine bakın.
Kod tabanı ile başlamak
Weblate kod tabanına alışmak için bazı hatalar arıyorsanız, good first issue olarak etiketlenmiş olanlara bakın.
Bu konular üzerinde sormadan çalışmaya başlayabilirsiniz. Yalnızca çalışmaya başladığınızı duyurun. Böylece herkes birisinin bu konu üzerinde çalıştığını bilir.
Weblate platformunu yerel olarak çalıştırma
Weblate geliştirmeye başlamanın en kolay yolu Kaynaklardan kurulum bölümündeki yönergeleri izlemektir. Böylece, düzenlenebilir Weblate kaynaklarını içeren bir virtualenv oluşturabilirsiniz.
Weblate kaynak kodlarını kopyalayın:
git clone https://github.com/WeblateOrg/weblate.git
cd weblate
Bir virtualenv oluşturun:
virtualenv .venv
.venv/bin/activate
Weblate kurulumunu yapın (bunun için bazı sistem bağımlılıklarına gerek duyulur. Bilgi almak için: Kaynaklardan kurulum):
pip install -e .
Geliştirme için yararlı olacak tüm bağımlılıkları kurun:
pip install -r requirements-dev.txt
Bir geliştirme sunucusu başlatın:
weblate runserverYapılandırmanıza bağlı olarak, Celery işlemlerini de başlatmak isteyebilirsiniz:
./weblate/examples/celery startBir deneme yapın (bilgi almak için: Local testing):
. scripts/test-database.sh
./manage.py test
Ayrıca bakınız
Weblate platformunu Docker üzerinde yerel olarak çalıştırma
If you have Docker and docker-compose installed, you can spin up the development environment by simply running:
./rundev.sh
It will create a development Docker image and start it. Weblate is running on
<http://127.0.0.1:8080/> and you can sign in as the user admin using admin
as the password. The new installation is empty, so you might want to continue with
Adding translation projects and components.
The Dockerfile and docker-compose.yml for this are located in the
dev-docker directory.
The script also accepts some parameters, to execute tests, run it with the
test parameter and then specify any test parameters,
for example running only tests in the weblate.machine module:
./rundev.sh test --failfast weblate.machine
Not
Be careful that your Docker containers are up and running before running the
tests. You can check that by running the docker ps command.
To display the logs:
./rundev.sh logs
To stop the background containers, run:
./rundev.sh stop
Running the script without arguments will re-create the Docker container and restart it.
Not
This is not a suitable setup for production, as it includes several hacks which are insecure, but they make development easier.
Bootstrapping your devel instance
You might want to use import_demo to create demo translations and
createadmin to make an admin user.
Coding Weblate with PyCharm
PyCharm is a known IDE for Python, here are some guidelines to help you set up your Weblate project in it.
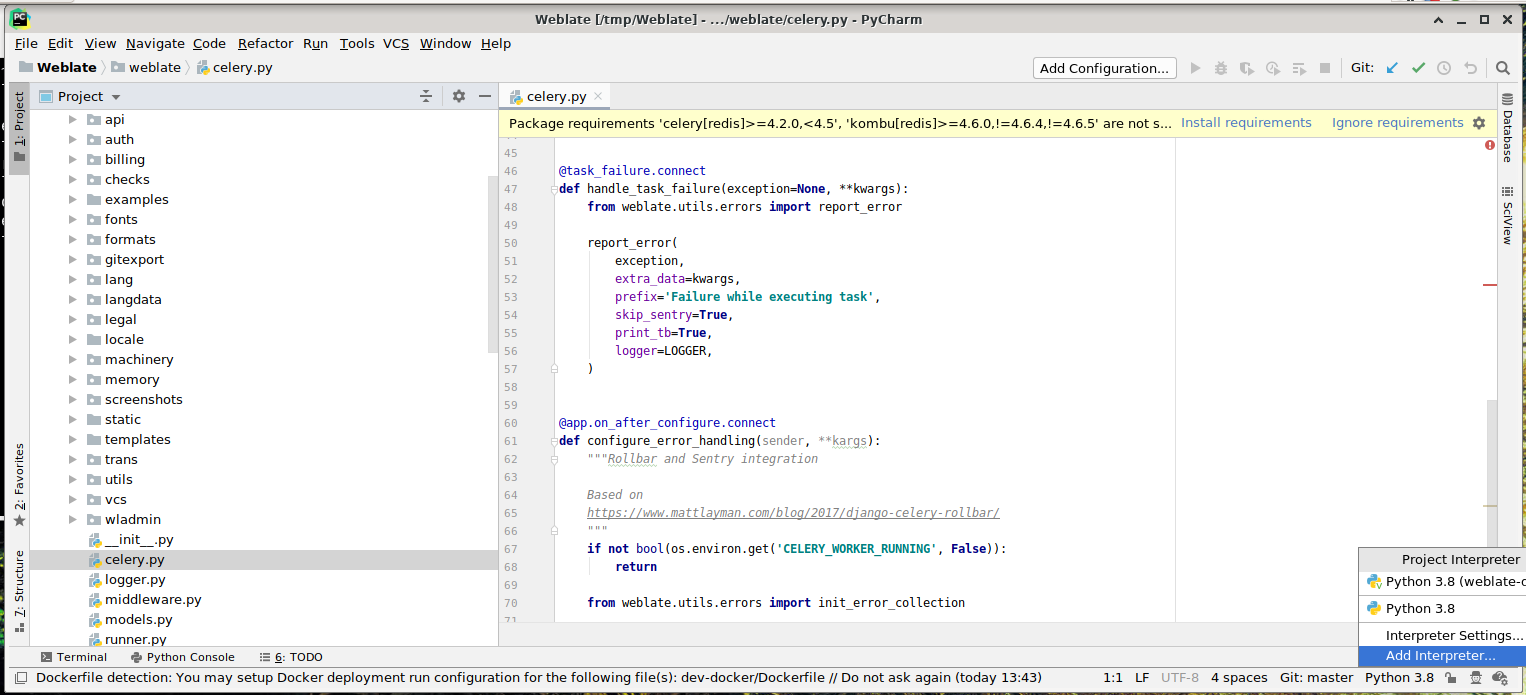
Considering you have just cloned the GitHub repository to a folder, just open it with PyCharm. Once the IDE is open, the first step is to specify the interpreter you want to use:
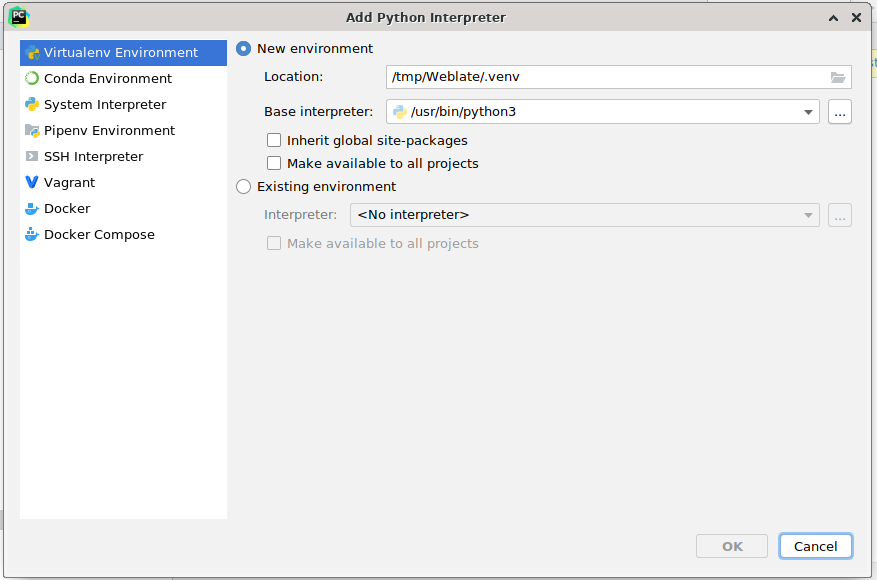
PyCharm sizin için bir virtualenv oluşturabilir ya da zaten var olan bir virtualenv kullanmayı seçebilirsiniz:
Yorumlayıcı ayarlandıktan sonra bağımlılıkları kurmayı unutmayın: Konsol üzerinden (IDE içindeki konsol varsayılan olarak doğrudan belirttiğiniz virtualenv kullanır) ya da eksik bağımlılıklar hakkında bir uyarı aldığınızda arabirim üzerinden.
The second step is to set the right info to use Django natively inside PyCharm: The idea is to be able to immediately trigger the unit tests in the IDE. For that you need to specify the root path of the Django project and the path to its settings:
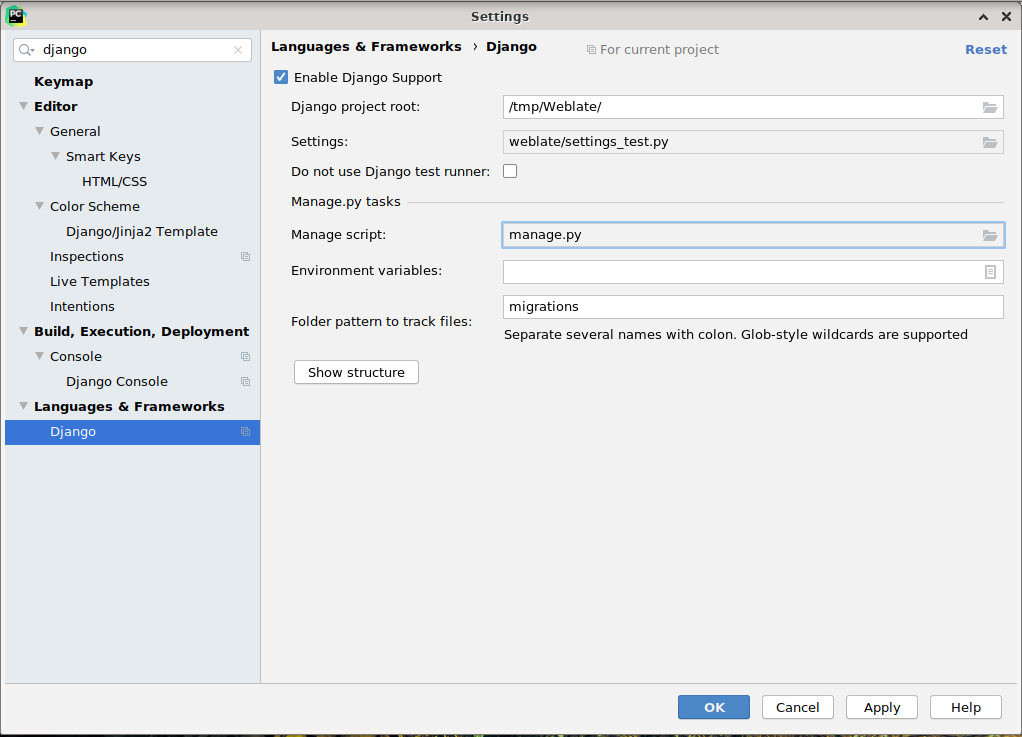
Be careful, the Django project root is the actual root of the repository, not the Weblate
sub-directory. About the settings, you could use the weblate/settings_test.py from the
repository, but you could create your own setting and set it there.
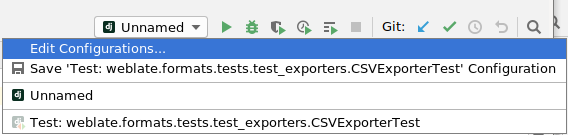
The last step is to run the server and to put breakpoints in the code to be able to debug it. This is done by creating a new Django Server configuration:
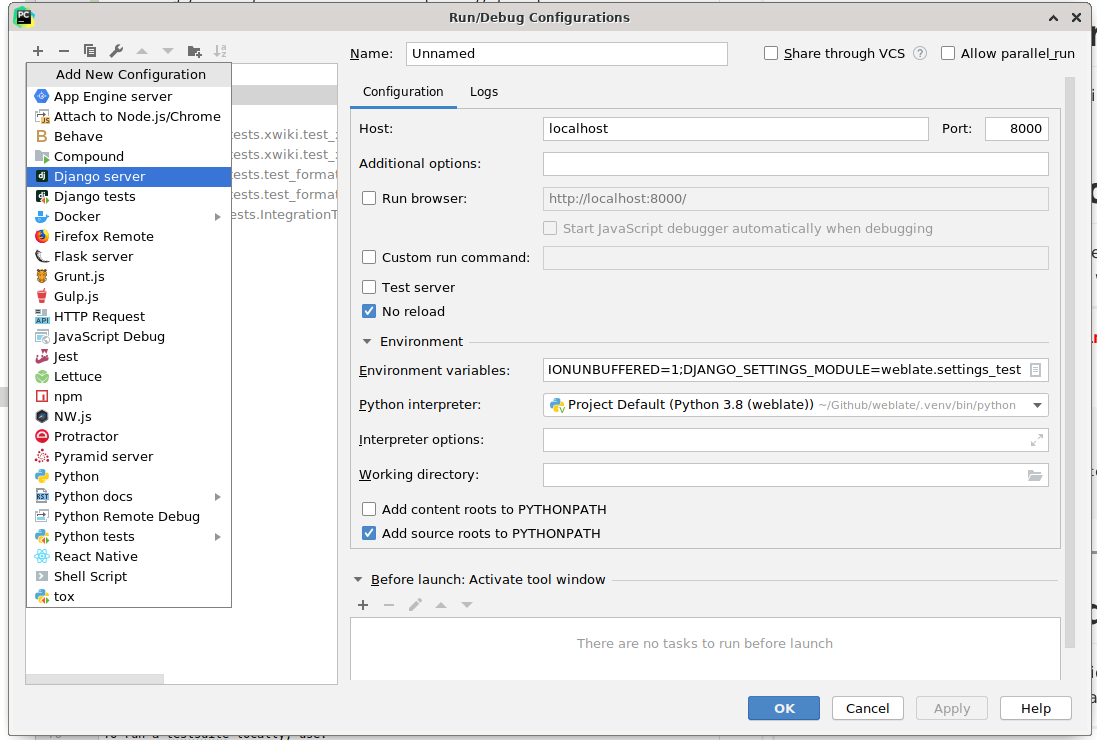
İpucu
Be careful with the property called No reload: It prevents the server from being reloaded live if you modify files. This allows the existing debugger breakpoints to persist, when they normally would be discarded upon reloading the server.