Starting contributing code to Weblate
Understand the Weblate source code by going through Weblate source code, Weblate frontend and Weblate internals.
Starting with the codebase
Familiarize yourself with the Weblate codebase, by having a go at the bugs labelled good first issue.
You are welcome to start working on these issues without asking. Just announce that in the issue, so that it’s clear that somebody is working on that issue.
Running Weblate locally
The most comfortable approach to get started with Weblate development is to follow Installing from sources. It will get you a Python environment with editable Weblate sources.
Clone the Weblate source code:
git clone https://github.com/WeblateOrg/weblate.git
cd weblate
Install Weblate and all dependencies useful for development:
uv sync --all-extras --dev
Start a development server:
uv run weblate runserver
Depending on your configuration, you might also want to start Celery workers:
uv run ./weblate/examples/celery start
To run tests (see Local testing of Weblate for more details):
. scripts/test-database.sh
uv run pytest
See also
Running Weblate locally in Docker
If you have Docker and the docker-compose-plugin installed, you need an additional tool
called jq which you can install through your favorite package manager. Then, you can
spin up the development environment by simply running:
./rundev.sh
It will create a development Docker image and start it. Weblate is running on
<http://127.0.0.1:8080/> and you can sign in as the user admin using admin
as the password. The new installation is empty, so you might want to continue with
Adding translation projects and components.
Weblate is configured to use maildev container as an e-mail server. The delivered e-mails can be seen at <http://127.0.0.1:1080/>.
The Dockerfile and docker-compose.yml for this are located in the
dev-docker directory. For easier access to the database during development,
the container running PostgreSQL is exposed on port 5433.
The script also accepts some parameters, to execute tests, run it with the
test parameter and then specify any test parameters,
for example running only tests in the weblate.machine module:
./rundev.sh test --exitfirst weblate/machine
Note
Be careful that your Docker containers are up and running before running the
tests. You can check that by running the docker ps command.
To display the logs:
./rundev.sh logs
To stop the background containers, run:
./rundev.sh stop
Running the script without arguments will re-create the Docker container and restart it.
Warning
This container is not suitable for production use. Security is sacrificed to make the development easier.
Bootstrapping your devel instance
You might want to use import_demo to create demo translations and
createadmin to make an admin user.
If you have Billing installed as well, you can use
billing_demo to create a demo billing project.
Coding Weblate with PyCharm
PyCharm is a known IDE for Python, here are some guidelines to help you set up your Weblate project in it.
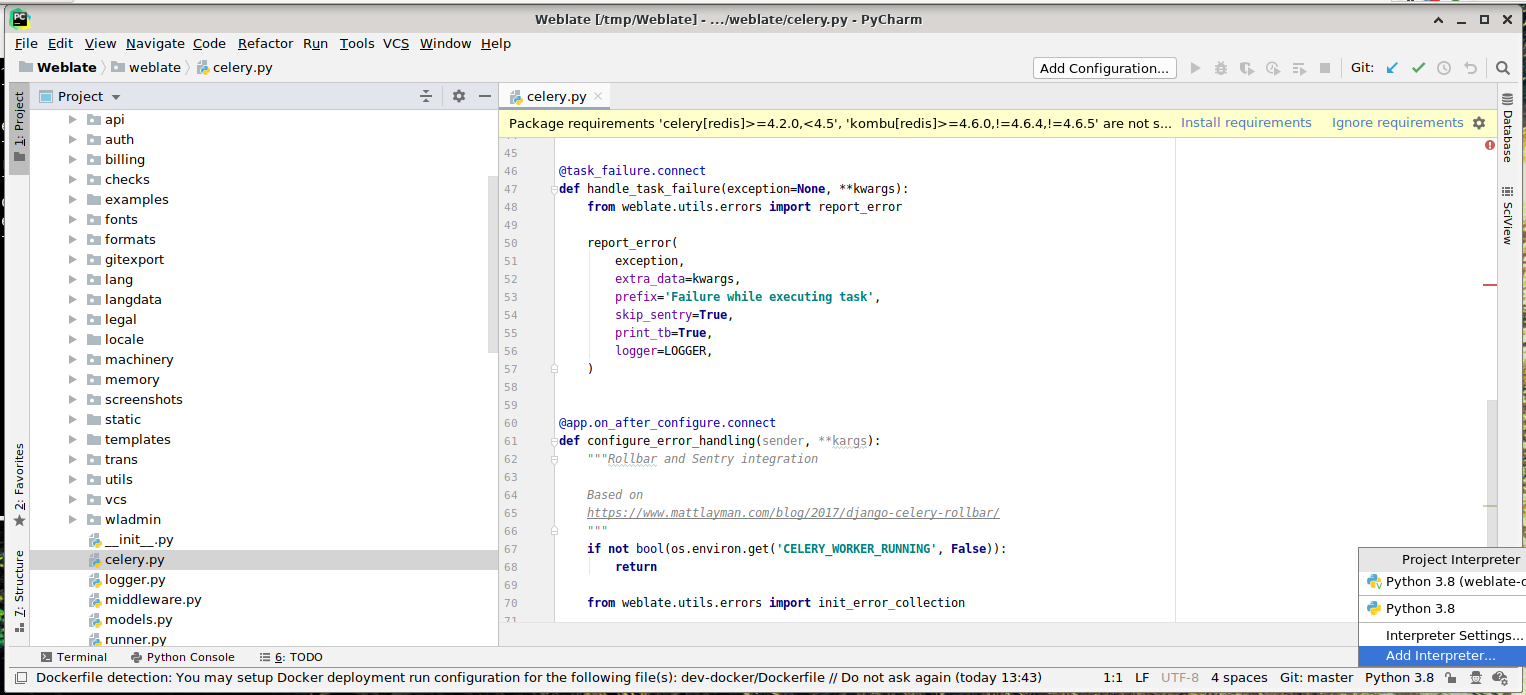
Considering you have just cloned the GitHub repository to a folder, just open it with PyCharm. Once the IDE is open, the first step is to specify the interpreter you want to use:
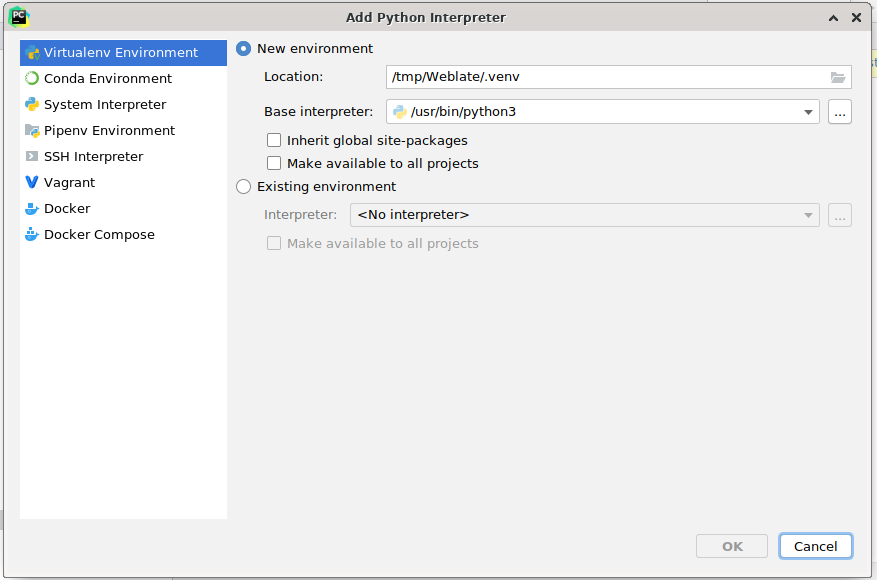
Select the .venv environment created by uv sync --all-extras --dev
to match the command-line development setup. You can also let PyCharm create a
Python environment for you, but the uv-managed environment is preferred:
Don’t forget to install the dependencies once the interpreter is set. When
using the preferred uv-managed environment, run uv sync --all-extras --dev
from the console.
The second step is to set the right info to use Django natively inside PyCharm: The idea is to be able to immediately trigger the unit tests in the IDE. For that you need to specify the root path of the Django project and the path to its settings:
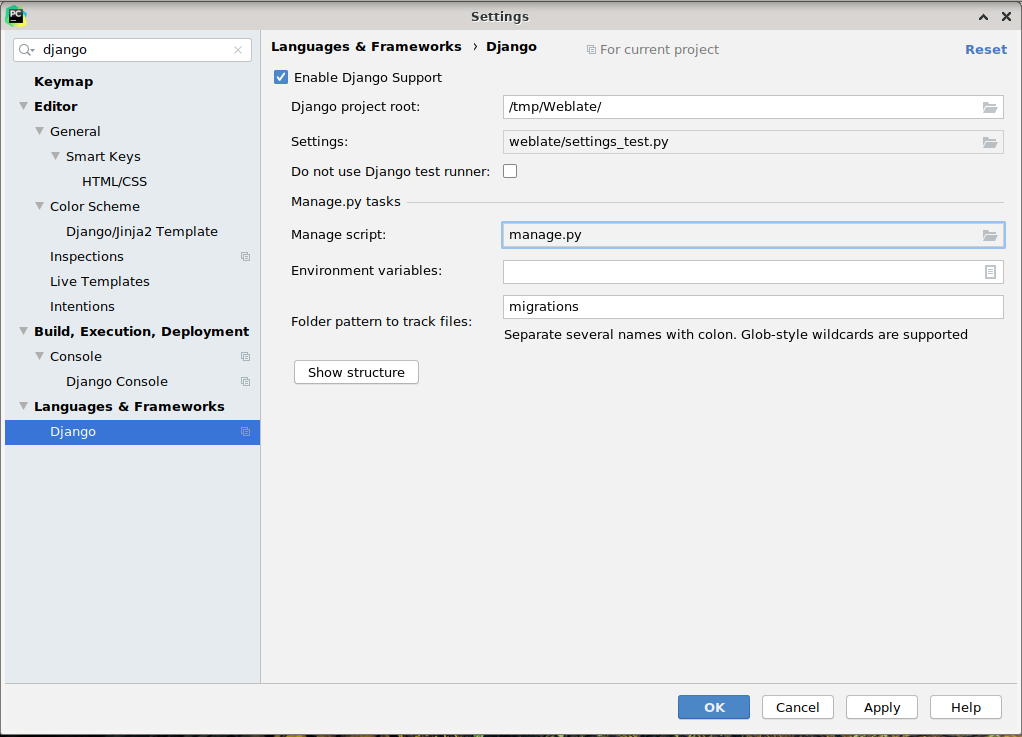
Be careful, the Django project root is the actual root of the repository, not the Weblate
sub-directory. About the settings, you could use the weblate/settings_test.py from the
repository, but you could create your own setting and set it there.
The last step is to run the server and to put breakpoints in the code to be able to debug it. This is done by creating a new Django Server configuration:
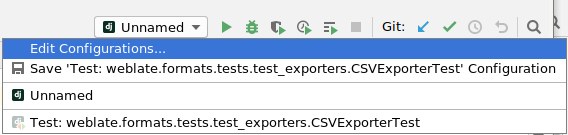
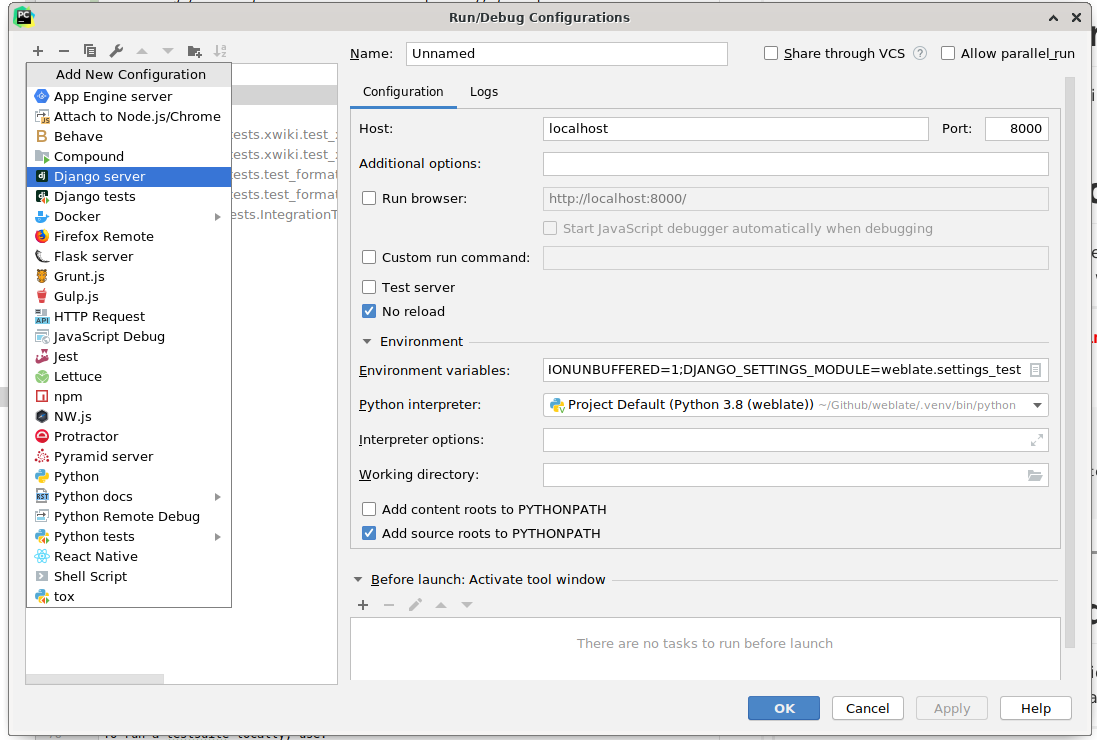
Hint
Be careful with the property called No reload: It prevents the server from being reloaded live if you modify files. This allows the existing debugger breakpoints to persist, when they normally would be discarded upon reloading the server.