Translation process
Suggestion voting
Everyone can add suggestions by default, to be accepted by signed in users. Suggestion voting can be used to make use of a string when more than one signed-in user agrees, by setting up the Component configuration with Suggestion voting to turn on voting, and Automatically accept suggestions to set a threshold for accepted suggestions (this includes a vote from the user making the suggestion if it is cast).
Note
Once automatic acceptance is set up, normal users lose the privilege to directly save translations or accept suggestions. This can be overridden with the Edit string when suggestions are enforced permission.
You can combine these with access control into one of the following setups:
Users suggest and vote for suggestions and a limited group controls what is accepted.
Turn on voting.
Turn off automatic acceptance.
Don’t let users save translations.
Users suggest and vote for suggestions with automatic acceptance once the defined number of them agree.
Turn on voting.
Set the desired number of votes for automatic acceptance.
Optional voting for suggestions. (Can optionally be used by users when they are unsure about a translation by making multiple suggestions.)
Only turn on voting.
Additional info on source strings
Enhance the translation process by adding additional info to the strings including explanations, string priorities, check flags and visual context. Some of that info may be extracted from the translation files and some may be added by editing the additional string info:
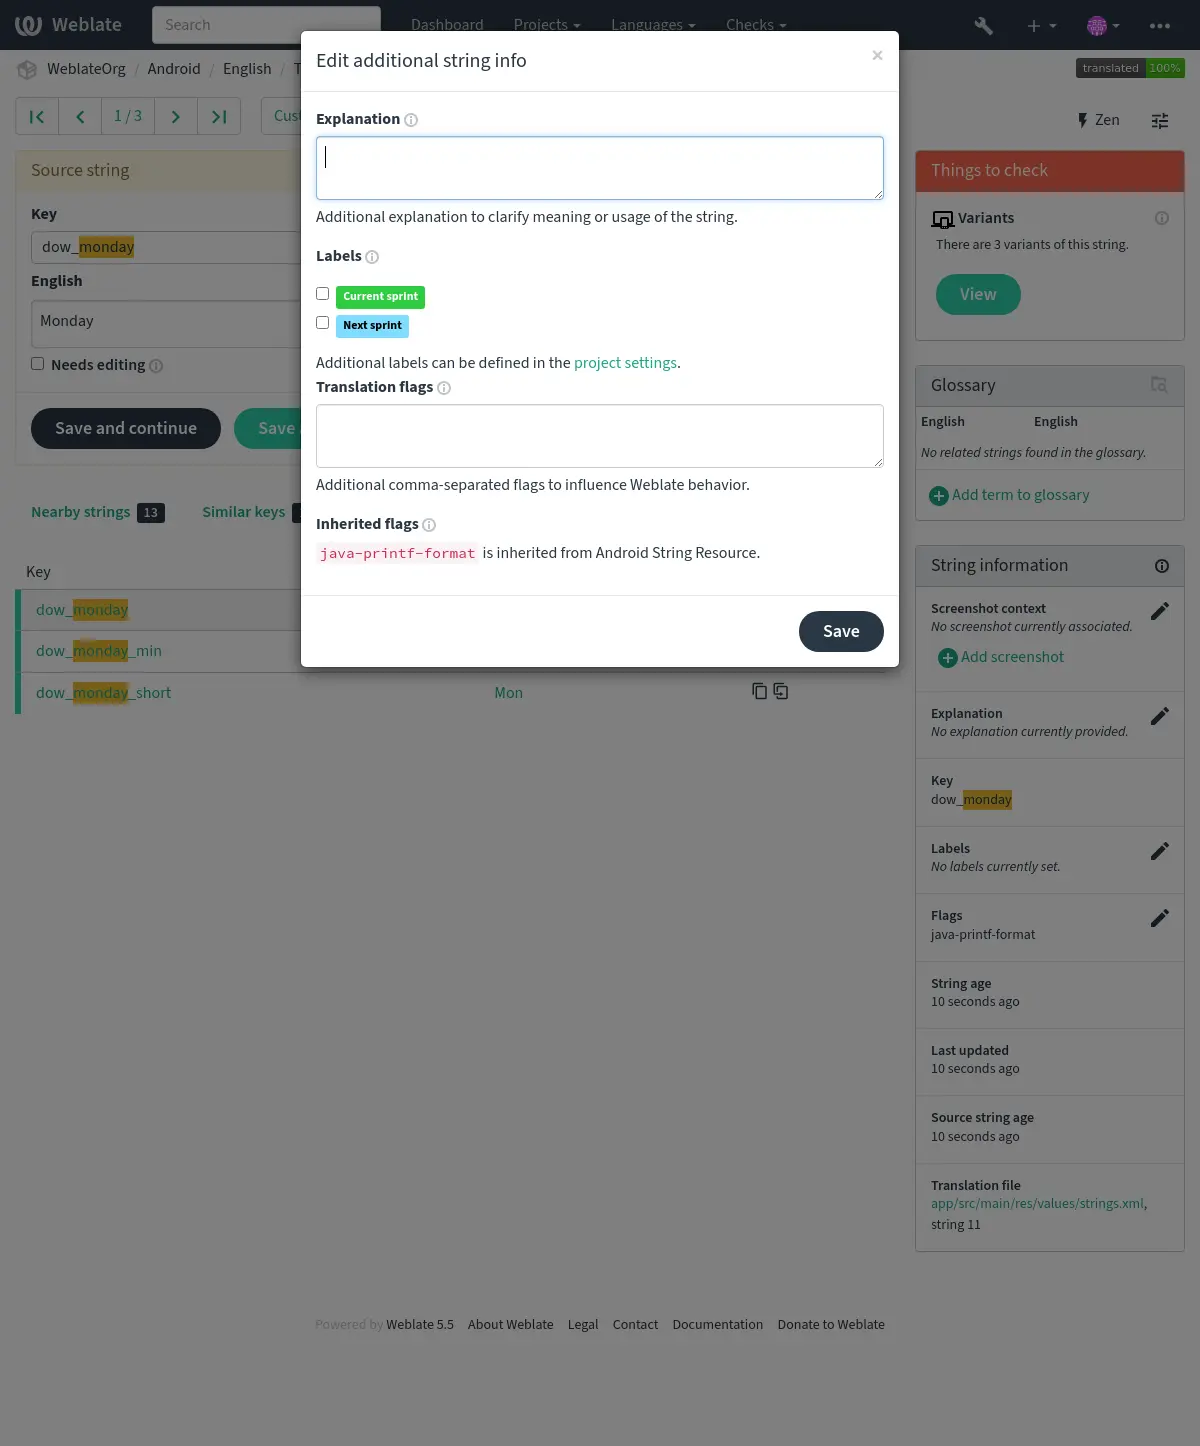
Access this directly from the translation interface by clicking the “Edit” icon next to Screenshot context or Flags.
Strings prioritization
String priority can be changed to offer higher priority strings for translation earlier by
using the priority flag.
Hint
This can be used to order the flow of translation in a logical manner.
See also
Translation flags
Customization of quality checks and other Weblate behavior, see Customizing behavior using flags.
The string flags are also inherited from the Translation flags at Component configuration and flags from the translation file (see Localization file formats).
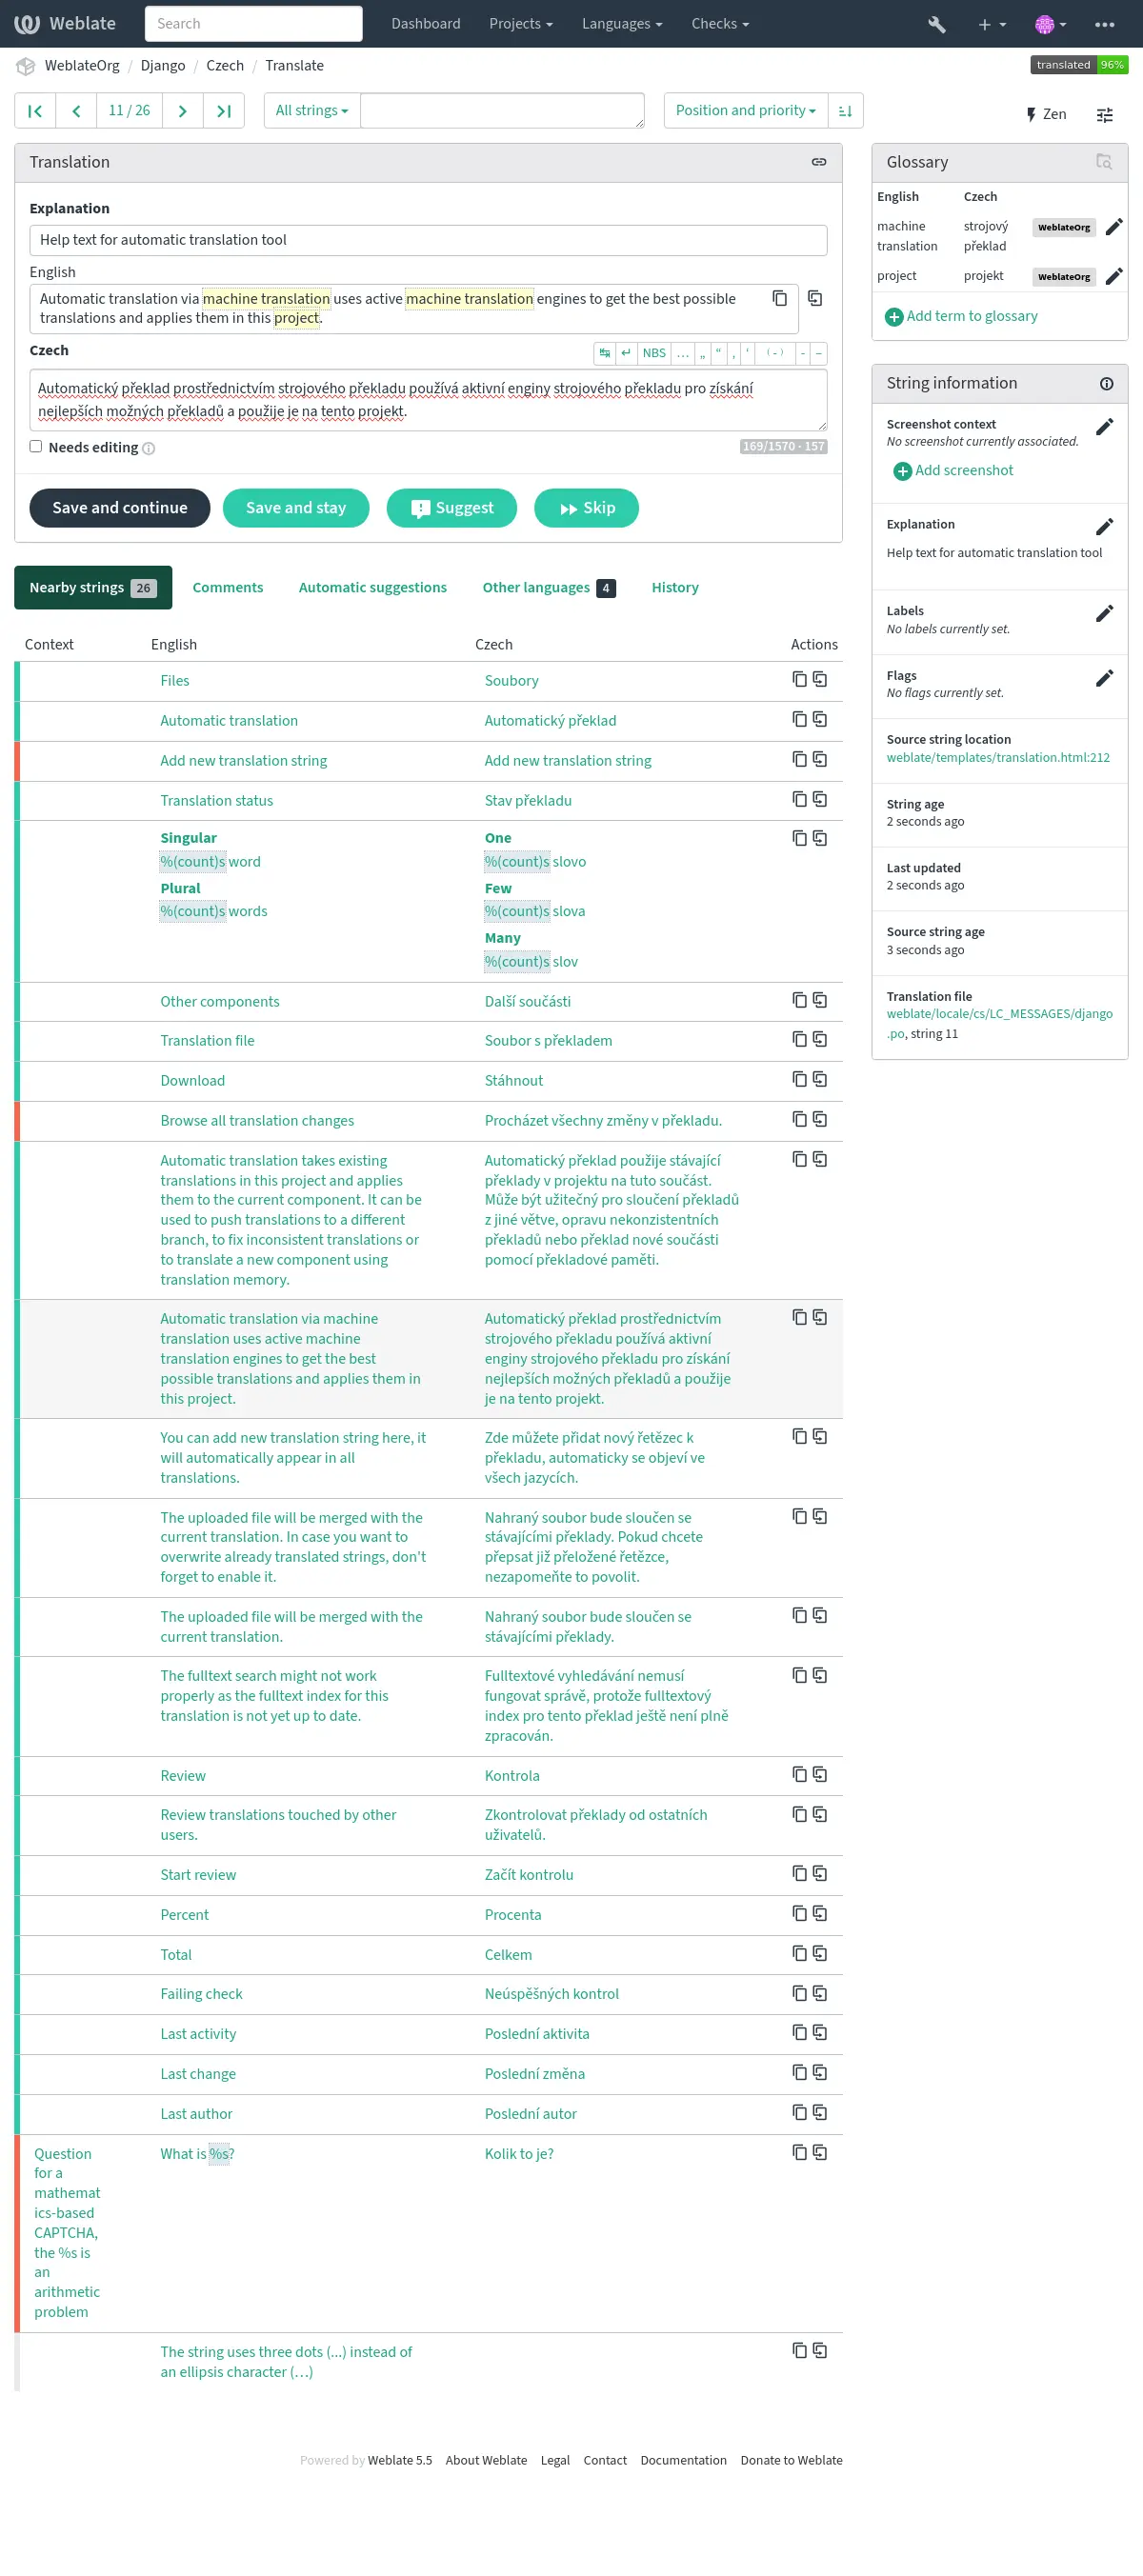
Explanation
Changed in version 4.1: In previous versions this has been called Extra context.
Changed in version 4.18: Support for syncing explanation with a file was introduced.
Use the explanation to clarify scope or usage of the translation. You can use Markdown to include links and other markup.
Some file formats support storing explanation within the file, see Explanation.
Hint
Weblate can also display description present in the translation file for some formats, see Source string description.
Screenshots and visual context
You can upload a screenshot showing a given source string in use within your program. This helps translators understand where it is used, and how it should be translated.
The uploaded screenshot is shown in the translation context sidebar:
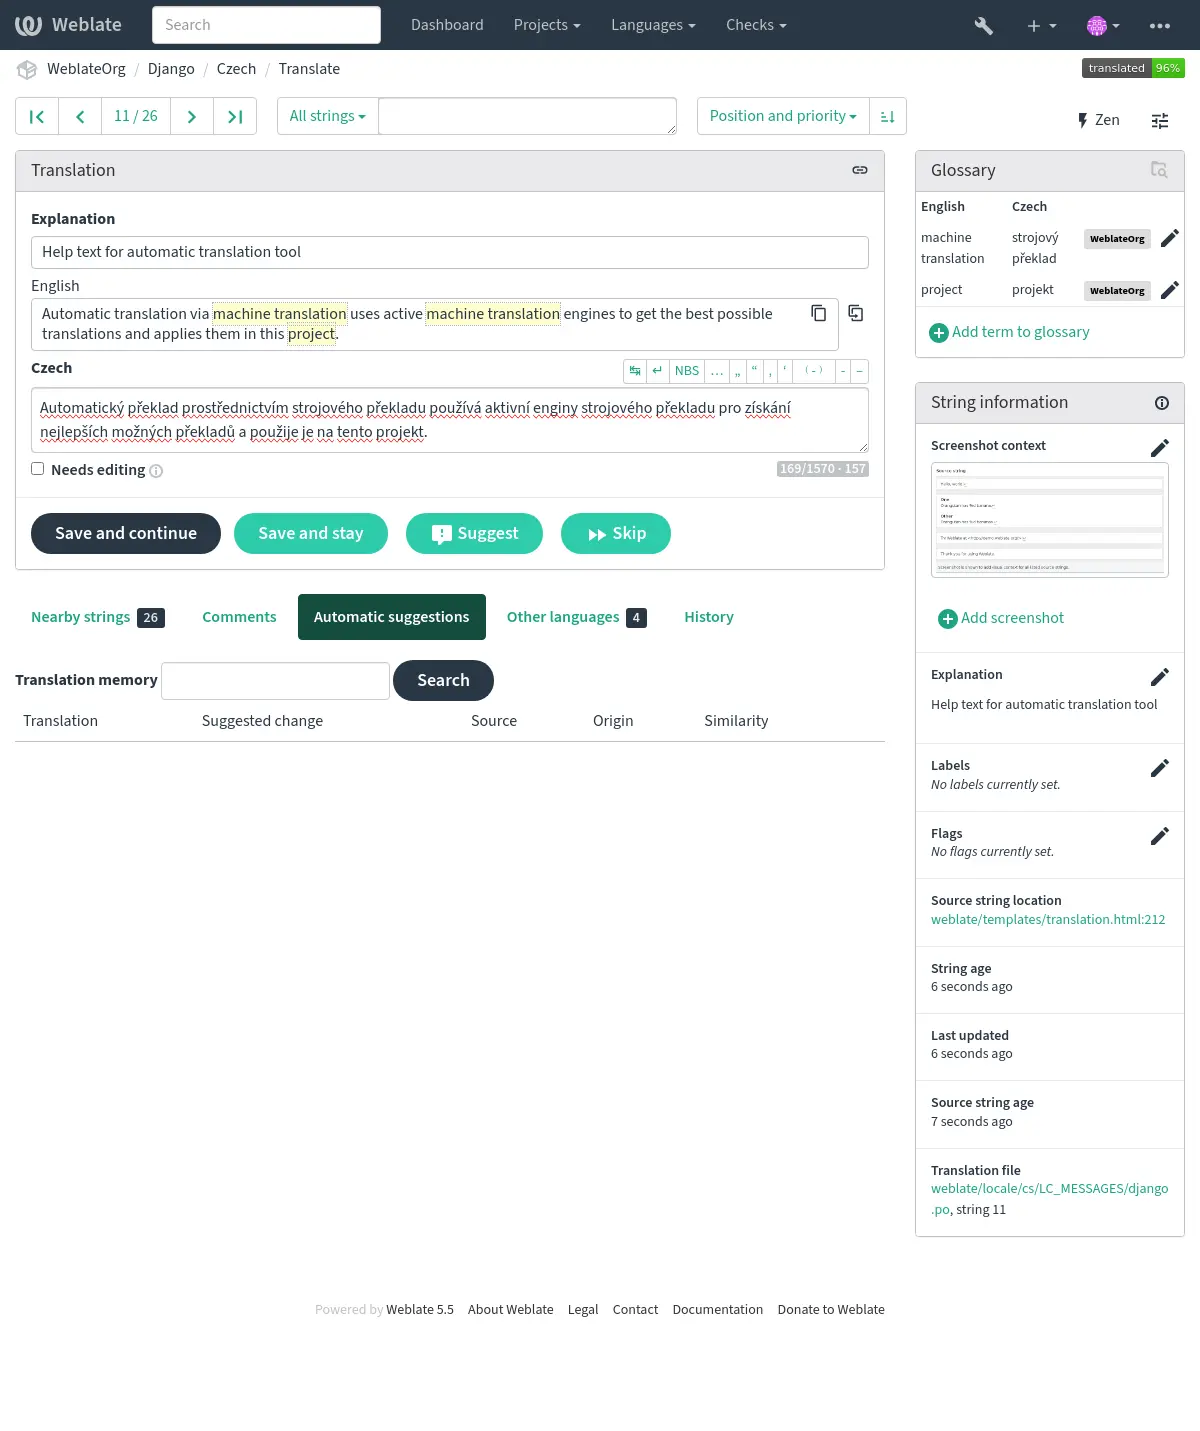
In addition to Additional info on source strings, screenshots can be managed in the Weblate UI, kept in sync from the repository, or handled through the Weblate’s REST API.
Managing screenshots in the UI
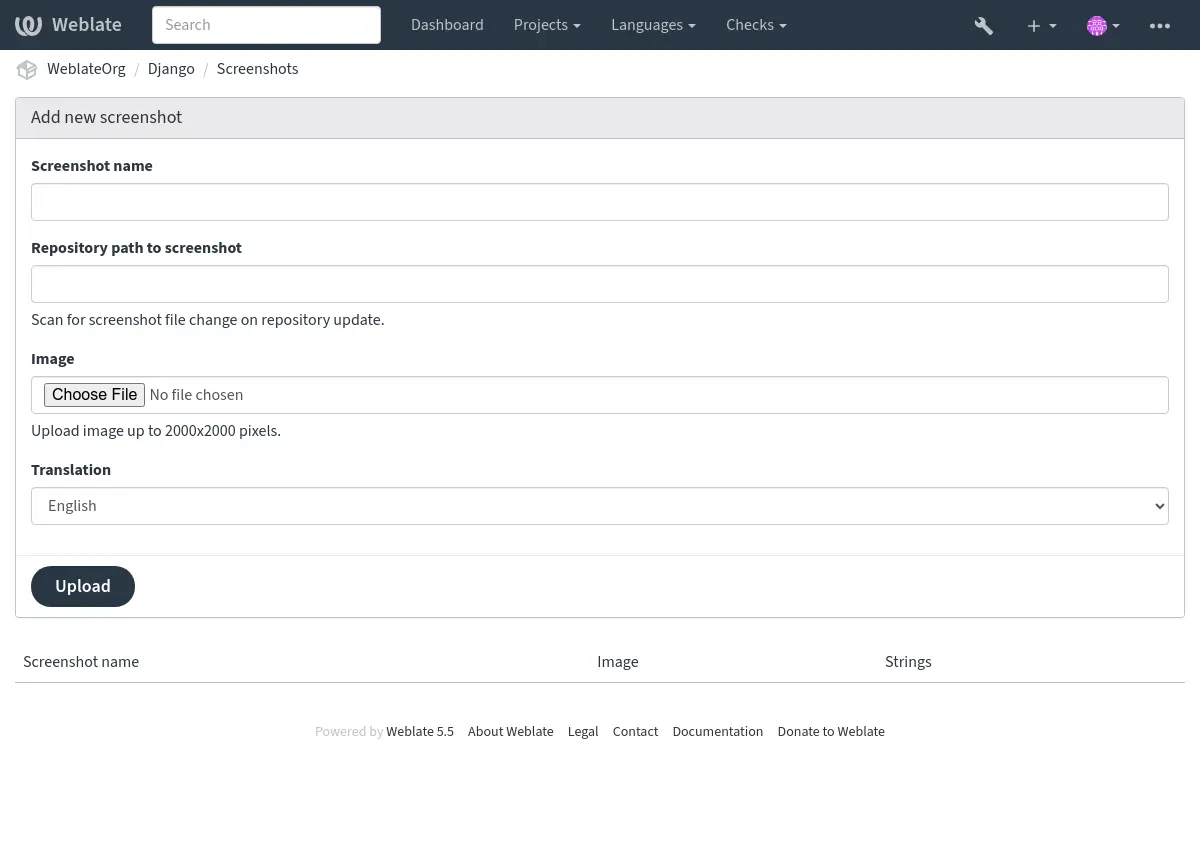
Each screenshot is stored for a specific translation language. In the translate page, screenshots attached to the source language are shown for every translation of the string, while screenshots attached to any other language are shown only for that language. You can add a screenshot directly from the translate page using Add screenshot in the Screenshot context panel, or open the separate management interface under the Operations menu. There you can upload screenshots, assign them to source strings manually, or let Weblate find strings in the image using text recognition (OCR) with the Find strings in image button. Matching source strings can be assigned individually, in a selected batch, or all at once.
The screenshot listing summarizes uploaded screenshots and lets you search or filter them:
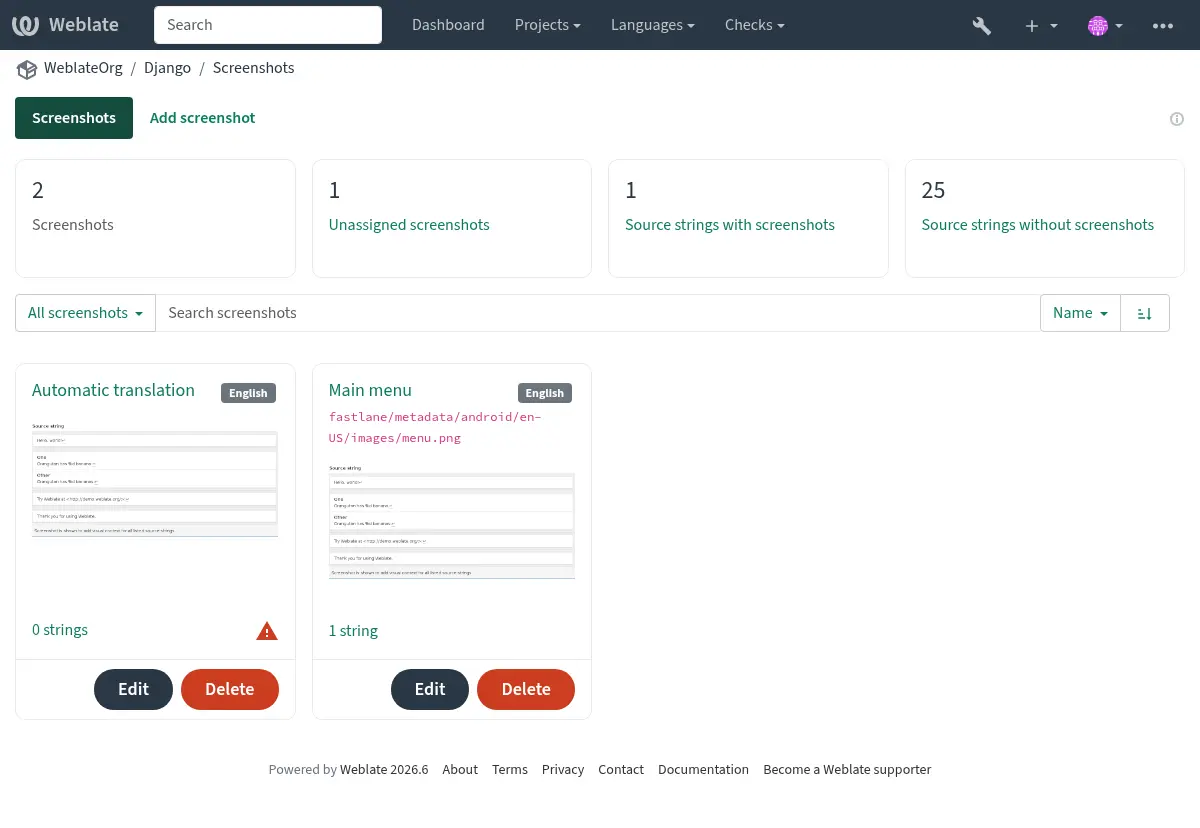
Once a screenshot is uploaded, this interface handles management and source string association:
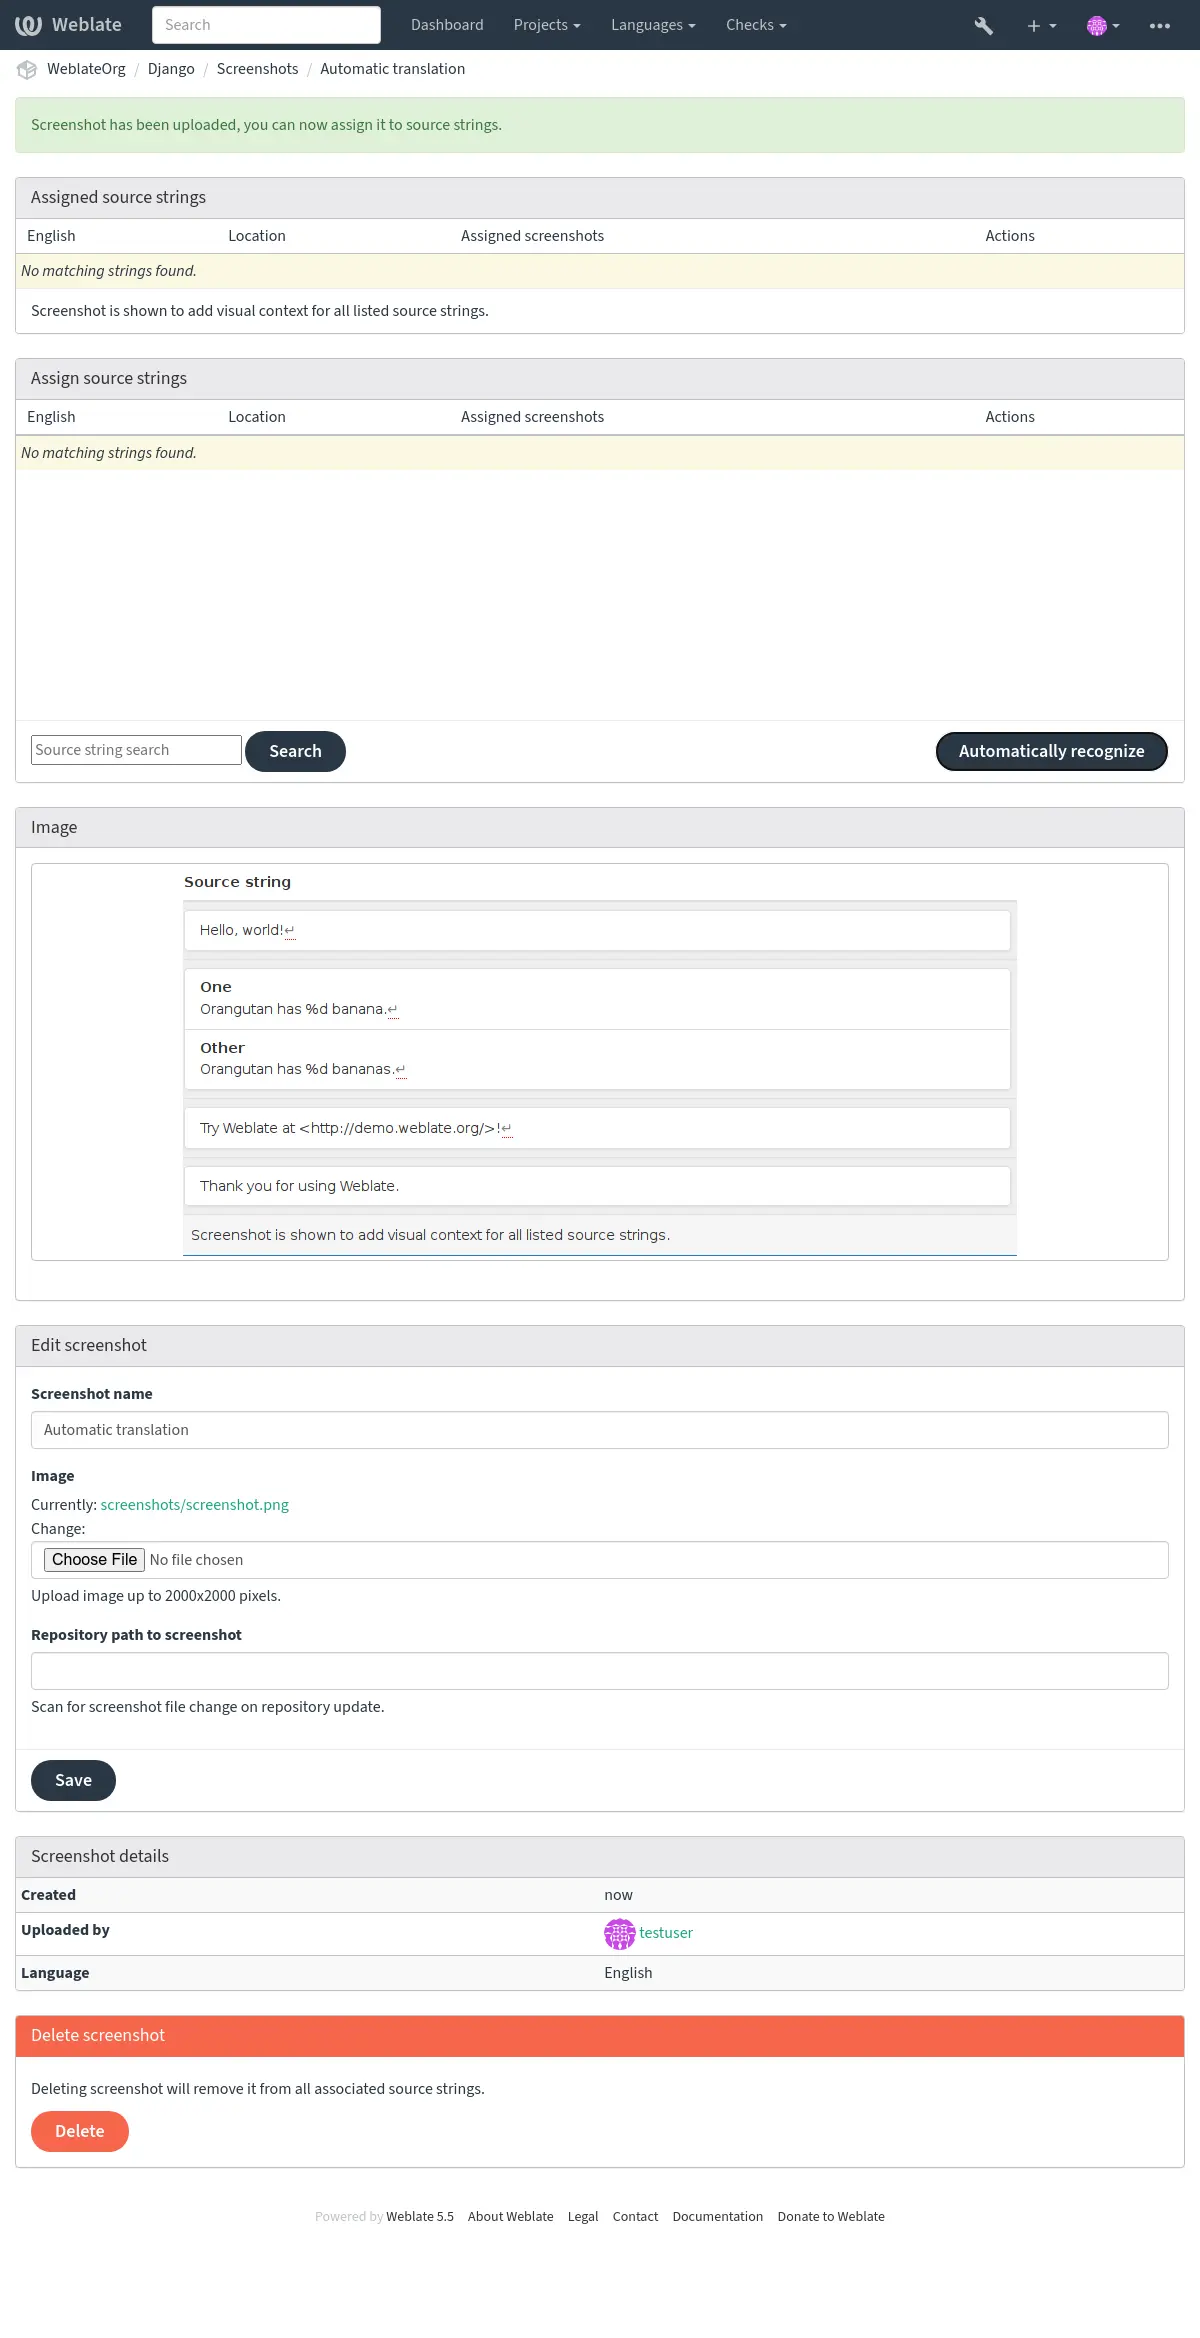
Use the screenshot listing search to find screenshots by name, repository path,
language, assigned source string, source string context, or source string
location. The search accepts plain text as well as advanced screenshot queries,
see Searching for screenshots. For example, use NOT has:string to find
unassigned screenshots, has:string to find assigned screenshots, or
repository:fastlane to review screenshots discovered from repository paths.
You can upload a screenshot from a local file, paste it from the clipboard, or
provide a URL to download an image from an external source. URL-based uploads
may be restricted based on the ALLOWED_ASSET_DOMAINS setting, which
controls which domains are trusted for downloading external assets, including
any redirects followed while fetching the image, and
ASSET_RESTRICT_PRIVATE, which rejects internal or non-public targets
unless they are included in ASSET_PRIVATE_ALLOWLIST. The
ALLOWED_ASSET_SIZE setting limits maximal size for the asset.
Managing screenshots from the repository
You can add or update screenshots directly from your Version Control System (VCS) repository.
To enable this feature, you can either set a screenshot file mask when creating a component, which will be monitored for updates in the repository, or you can add or update screenshots when uploading them manually.
To connect a manually uploaded screenshot with later repository updates, fill in Repository path to screenshot with the path tracked in the repository.
When the repository is updated, the system will automatically scan for changes. Existing screenshots in the repository will be updated, and new screenshots matching the specified screenshot file mask will be added to the component.
For application projects, a practical workflow is:
Capture source-language screenshots for the most visible user interface.
Store them in a stable repository path, for example below
fastlane/metadata/android/en-US/images/phoneScreenshots/.Configure Screenshot file mask for that path.
Update the component repository so Weblate discovers or refreshes the screenshots.
Use OCR or source string search to assign screenshots to the matching source strings, and review the Source strings without screenshots counter for important strings still missing visual context.
See also
Managing screenshots through the API
Screenshot workflows are also available through the REST API. Use
GET /api/components/(string:project)/(string:component)/screenshots/
to list screenshots for one component, POST /api/screenshots/ to
create screenshots,
POST /api/screenshots/(int:id)/file/ to replace the image,
POST /api/screenshots/(int:id)/units/ and
DELETE /api/screenshots/(int:id)/units/(int:unit_id) to manage source
string associations, and DELETE /api/screenshots/(int:id)/ to delete
screenshots. Screenshot API objects include the related translation and the
optional repository path used for repository-based updates.