Migrating to Weblate
Are you using a different localization platform and considering switching to Weblate? This guide provides a quick, step-by-step process to help you migrate your translation project from platforms like Transifex, Crowdin, Lokalise, or similar services.
Weblate is designed around continuous localization with Git integration at its core, making it ideal for teams that want to keep translations close to their development workflow.
Ver también
Starting with internationalization for choosing the right internationalization framework
Integración con Weblate, para opciones de integración detalladas
Localización continua for setting up automated workflows
Prerequisites
Before starting your migration, ensure you have:
On your localization platform:
Acceso para exportar sus archivos de traducción
List of translators and their roles/permissions
Understanding of your current workflow (review process, automation, etc.)
Para Weblate:
A Weblate instance (either Hosted Weblate or self-hosted)
Admin or project creation permissions on your Weblate instance
Prepare your translation files
Export translations from your current platform
Most localization platforms allow you to export all translations at once:
Transifex: utilice su herramienta CLI o descarga traducciones desde el interfaz de web
Crowdin: Export all translations as a ZIP file from project settings
Lokalise: Use the bulk export feature
Phrase: Download all locales from the project dashboard
Consejo
Keep your translation files in the format native to your internationalization framework (PO, XLIFF, JSON, etc.) rather than converting them. Weblate supports many formats.
Consignar traducciones a su repositorio Git
Consejo
If you would rather not store translations in an external Git repository, you can skip this step and use the Upload translation files option when creating a component.
Si tus traducciones no están ya en el Git:
Create a Git repository or use your existing project repository
Organize translation files following your project structure
Consignar y enviar los archivos a su servicio de hospedaje Git (GitHub, GitLab, Bitbucket, etc.)
git add locales/
git commit -m "Add translation files for Weblate migration"
git push origin main
Ver también
Localización continua para estructura de repositorio óptima
Integración de control de versiones para sistema de control de versiones apoyado
Import your project into Weblate
Crea un proyecto nuevo
Navega a su instancia de Weblate.
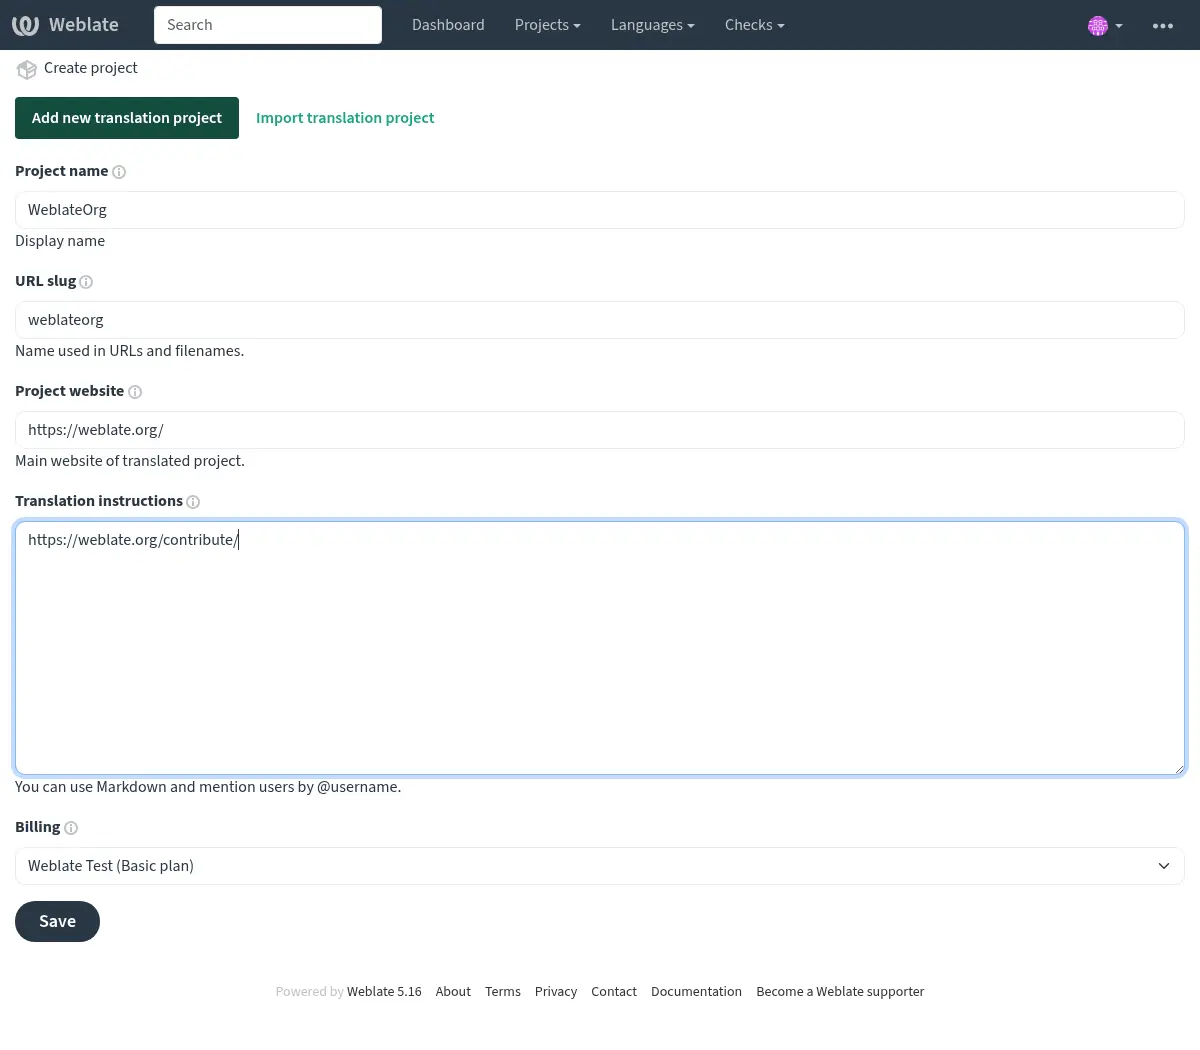
Click Add new translation project in the + menu.
Fill in your project details:
Project name: Your application or project name
URL slug: Short identifier (e.g.,
myapp)Proyecto de sitio web: su página inicial de su proyecto web (opcional)
Ver también
Añadir proyectos y componentes de traducción for detailed project creation instructions
Añade un componente desde su repositorio Git
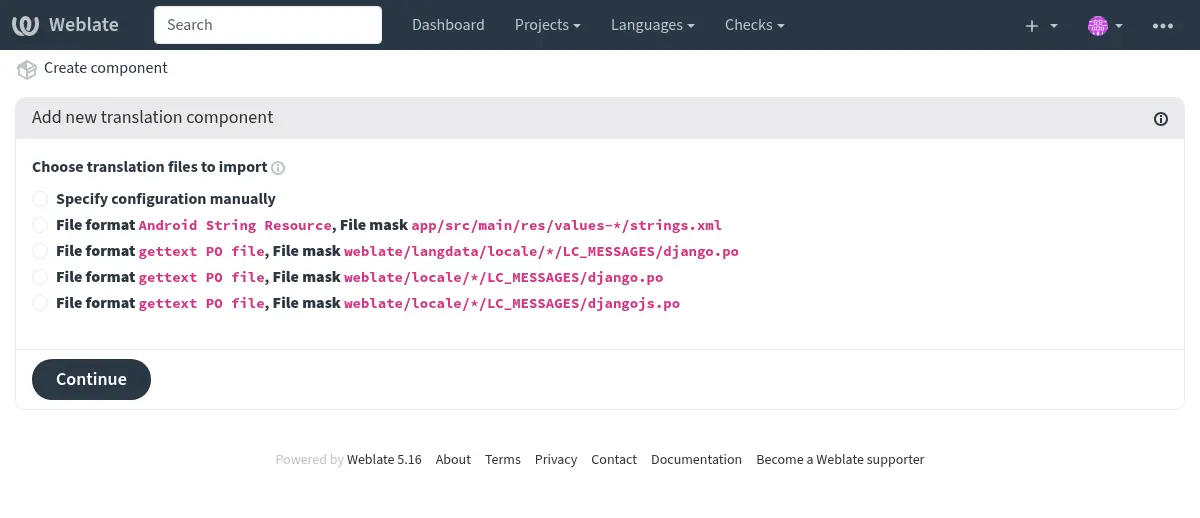
After creating the project, click Add new translation component
Seleccione Desde control de versión
Configura tu componente:
Component name: e.g., «Application strings», «Website», «Documentation»
Repository URL: Your Git repository URL (HTTPS or SSH)
Repository branch: Optional: Specify repository branch (Weblate automatically detects the default branch if not specified)
Weblate will automatically detect:
Translation file format
Available languages
Idioma del código fuente
Revise y confirme los ajustes detectados
Consejo
For repositories with multiple translation components (e.g., separate files for backend, frontend, documentation), create a separate Weblate component for each.
You can speed this up using From existing component for shared repositories or Detección de componentes to automatically create them.
Ver también
Configuración de componentes para todas las opciones de la configuración
Formatos bilingües y monolingües for understanding monolingual vs. bilingual formats
Configure your workflow
Set up access control
Choose your project’s visibility and access level:
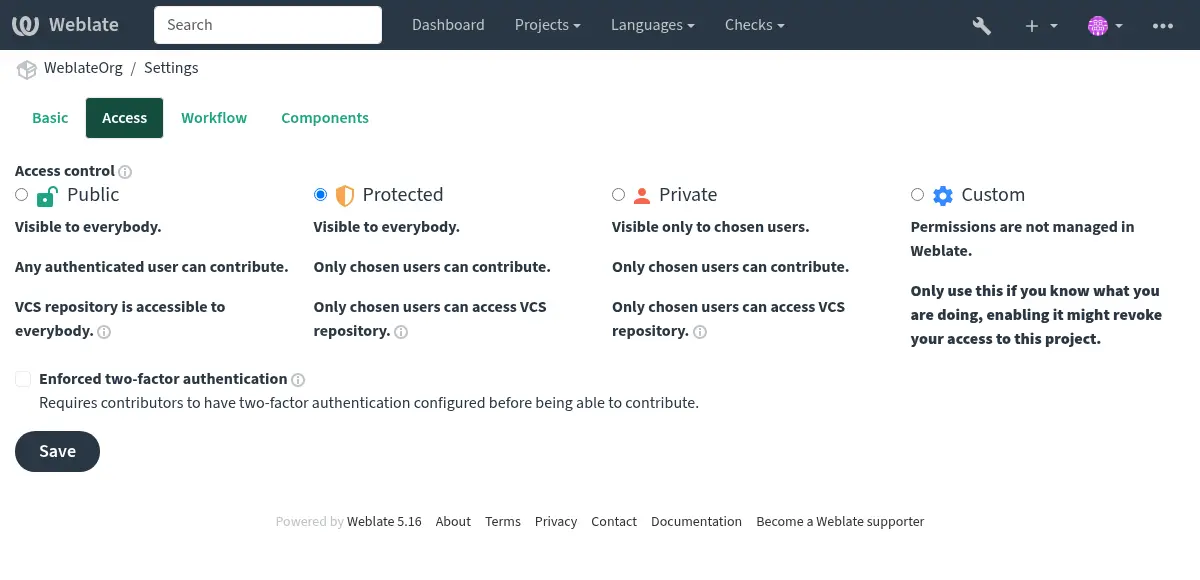
Go to your project settings: Operations → Settings → Access tab
Select the appropriate access control:
Público: proyecto de código abierto, cualquiera puede contribuir
Protected: Visible to all, but only invited users can translate
Private: Only invited users can view and translate
Ver también
Gestionar el control de acceso por proyecto for detailed access control configuration
Set up continuous localization
habilita actualizaciones automáticas y consignas:
Configura la integración del repositorio:
Pull changes: Set up a webhook so Weblate updates when your source code changes
Envío de cambios: Configure Enviar cambios efectuados en Weblate para que las traducciones se consoliden en su repositorio
Habilita acciones automáticas en ajustes del componente:
Subir en consolidar: sube automáticamente traducciones a su repositorio
Intervalo de consigna. establezca como a menudo las traductores pendientes son consignadas (p.e. cada 24 horas)
Ver también
Localización continua para automatización completa de flujo de trabajo
Configure quality checks and workflows
Personaliza los controles de calidad de la traducción:
Habilitar comprobaciones: revisa Comprobaciones de calidad y habilita cualquier opción interna de comprobaciones de calidad que necesite.
Set up review workflow: Enable Activar revisiones if you want an approval process.
Add enforced checks: Configure which quality checks should block translations.
Opcional: habilita complementos
Weblate offers Complementos to automate common tasks:
Actualizar archivos PO para que coincidan con POT (msgmerge): Automatically update PO files from POT templates
Limpieza de archivos de traducción: Quite las cadenas de traducción no utilizadas.
Concentrar consolidaciones de Git: aplastar consignas antes que subir al repositorio
Detección de componentes: Automatically discover new translation files
Ver también
Complementos for all available add-ons
Test and verify
Antes de anunciar la migración a sus traductores:
Test the workflow:
Make a test translation
Verify it appears in your Git repository
Pruebe efectuando cambios desde su repositorio a Weblate
Importar cualquier memoria de traducciones existente (opcional):
Utiliza Memoria de traducción para importar previas traducciones
This helps with consistency and speeds up translation
Configurar notificaciones:
Establecer Notificaciones para eventos de traducción
Configura el Actuadores de notificación del repositorio para su servicio de hospedaje Git
Ver también
Memoria de traducción for translation memory management
Invite and manage users
Invite translators
Para proyectos Protegidos y Privados:
Navigate to Operations → Users in your project
Use Add user to invite translators
Assign them to appropriate teams:
Traductores: pueden traducir cadenas
Revisores: pueden revisar y aprobar traducciones
Managers: Can manage project settings
For Public projects, users can start contributing immediately after signing up.
Truco
Send your translators a welcome message with:
Enlaza tu proyecto en Weblate
Overview of any project-specific terminology or style guides
Information about your review process
Ver también
Gestionar el control de acceso por proyecto para gestión de equipos
Control de acceso for advanced permission configuration
Next steps
Después de completar la migración:
Announce to translators: Informe a su equipo de traducción sobre la migración con instrucciones claras
Monitor initial usage: Esté atento a cualquier problema durante los primeros días
Gather feedback: Pregunte a los traductores sobre su experiencia en comparación con las plataformas anteriores
Optimize workflow: Ajuste la configuración según las necesidades de su equipo
Remove previous platform: Una vez completada la migración, recuerda revocar el acceso otorgado a la plataforma anterior.
Truco
Durante la migración, puede ejecutar ambas plataformas en paralelo durante un período de transición para asegurarse de que todo funcione como se espera antes de cambiar por completo.
Additional resources
Integración con Weblate - patrones de integración detallados
Flujos de trabajo de traducción - Diferentes configuraciones de flujo de trabajo
Localización continua - Localización continua automatizada
API REST de Weblate - API for automation and integrations
Informes de progreso de la traducción - Setting up translation progress reports
Preguntas frecuentes - cuestiones frecuentemente preguntadas
Consejo
Join the Weblate community if you need help during your migration. The community is active and helpful!