Instrucciones de configuración
Instalar Weblate
En función de la preparación y su experiencia, elija un método de instalación apropiado para usted:
Instalar con Docker, recomendable para montajes en entornos de producción.
Instalación en entorno virtual, recomendable para montajes en entornos de producción:
Instalar desde el código fuente, recomendable para el desarrollo.
Descripción general de la arquitectura
- Servidor web
Manipulando respuestas HTTP entrantes, Sirviendo archivos estáticos.
- Empleados de Celery
Tareas en segundo plano con Celery son ejecutados aquí.
Dependiendo de su carga de trabajo, quizá dese personalizar el número de empleados.
Utilice nodo dedicado cuando escale horizontalmente el Weblate.
- Servidor WSGI
Un servidor WSGI sirviendo páginas web a usuarios.
Utilice nodo dedicado cuando escale horizontalmente el Weblate.
- Base de datos
Servidor de base de datos PostgreSQL para almacenar todo el contenido, véase Configuración de base de datos para Weblate.
Utiliza nodo de base de datos dedicada para sitios con cientos de millones de palabras hospedadas.
- Redis
Servidor redis para caché y colas de tareas, consulte Tareas en segundo plano con Celery.
Utilice nodo dedicado cuando escale horizontalmente el Weblate.
- Sistema de archivo
Almacenaje del sistema de archivos para almacenar repositorios VCS y datos de usuario actualizado. Esto está compartido por todos los procesadores.
Utiliza almacenaje de red cuando escala Weblate horizontalmente.
- Servidor de correo-e
Servidor SMTP para salida de correo-e, consulte Configurar el correo electrónico saliente. Puede ser proporcionado externamente.
Consejo
Instalar con Docker incluye PostgreSQL y Redis, haciendo la instalación más fácil.
Requisitos de software
Sistema operativo
Se sabe que Weblate funciona en Linux, FreeBSD y macOS. Es posible que funcione también en otros sistemas similares a Unix.
Weblate no es compatible con Windows. Aun así, es posible hacerlo funcionar; aceptaremos parches para este fin.
Ver también
Descripción general de la arquitectura describe la arquitectura Weblate y servicios requeridos.
Dependencias de Python
Weblate está escrito en Python y es compatible con Python 3.11 o posterior. Puede instalar las dependencias mediante pip o desde los paquetes de su distribución. La lista completa está disponible en requirements.txt.
Dependencias más notables:
- Django
- Apio
- Translate Toolkit
- translation-finder
- Python Social Auth
- Marco REST de Django
Dependencias opcionalmente específicas |
Python packages |
Característica de Weblate |
|---|---|---|
|
||
|
||
|
||
|
||
|
||
|
Google Cloud Translation Advanced con soporte de glosario |
|
|
||
|
||
|
MySQL o MariaDB, consulte Configuración de base de datos para Weblate |
|
|
||
|
PostgreSQL, consulte Configuración de base de datos para Weblate |
|
|
||
|
Integración de SAML 2 IDP en Weblate |
|
|
Integración de Weblate Hospedado |
|
|
Integración de Weblate Hospedado |
|
|
Servidor wsgi para Weblate |
|
|
Cuando instale utilizando pip, puede especificar directamente características deseadas cuando instale:
uv pip install "weblate[Postgres,Amazon,SAML]"
O puede instalar Weblate con todas las funciones opcionales:
uv pip install "weblate[all]"
O puede instalar Weblate sin ninguna característica opcional:
uv pip install weblate
Solución de problemas al instalar pip
ERROR: Dependency 'gobject-introspection-2.0' is required but not found.El paquete instalado
PyGobjectno puede encontrar una biblioteca de GObject Instrospection coincidente. Antes de la liberación 3.52, está requeridogobject-introspection-1.0y desde entonces, requieregobject-introspection-2.0.En caso que su sistema operativo proporcione ambos, está recomendado instalar la versión más nueve y reintentar la instalación.
Cuando la versión más nueva no está disponible, instale la liberación más antigua de PyGobject antes de instalar Weblate:
uv pip install 'PyGobject<3.52'
ffi_prep_closure(): bad user_data (it seems that the version of the libffi library seen at runtime is different from the 'ffi.h' file seen at compile-time)Esto lo causa incompatibilidad de paquetes binarios distribuidos por PyPI con la distribución. Para direccionar esto, necesita recompilar el paquete en su sistema:
uv pip install --force-reinstall --no-binary :all: cffi
error: ‘xmlSecKeyDataFormatEngine’ undeclared (first use in this function); did you mean ‘xmlSecKeyDataFormat’?This is a known issue of the xmlsec package, please see https://github.com/xmlsec/python-xmlsec/issues/314.
lxml & xmlsec libxml2 library version mismatchThe
lxmlandxmlsecpackages have to be built against onelibxml2. You should build them locally to avoid this issue:uv pip install --force-reinstall --no-binary xmlsec --no-binary lxml lxml xmlsec
Otros requisitos de sistema
Deben instalarse las dependencias siguientes en el sistema:
Git- Pango, Cairo y cabecera de archivos relacionado y datos de introspección GObject
https://cairographics.org/, https://www.gtk.org/docs/architecture/pango, consulte Pango y Cairo
git-review(opcional para admitir Gerrit)git-svn(opcional para admitir Subversion)tesseract(solo necesario si tesserocr binario wheels no está disponible para su sistema)licensee(opcional para detectar licencia cunado crea componente)
Dependencias en tiempo de la compilación
Para compilar algunos de los Dependencias de Python quizá necesita instalar sus dependencias. Esto depende en somo instalarlos, por tanto consulte paquetes individual para documentación. No necesitaría esos si utiliza pre-compilación Wheeals mientras instala utilizando pid o cuando utilice paquetes de distribución.
Pango y Cairo
Weblate usa Pango y Cairo para renderizar widgets de mapa de bits (ver Promocionar la traducción) y para renderizar checks (ver Gestionar tipos de letra). Para instalar correctamente los vínculos de Python para estas bibliotecas necesitas instalar primero las bibliotecas del sistema: necesitas tanto Cairo como Pango, que a su vez necesitan GLib. Todas ellas deben estar instaladas con los archivos de desarrollo y los datos de introspección de GObject.
Requisitos de hardware
Weblate debería funcionar en cualquier hardware contemporáneo sin problemas, la siguiente es la configuración mínima necesaria para ejecutar Weblate en un único host (Weblate, base de datos y servidor web):
3 GB de RAM
2 núcleos de CPU
1 GB de espacio de almacenamiento
Nota
Requisitos actuales para su instalación de Weblate varían pesadamente basado en el tamaño de las traducciones gestionadas dentro de esto.
Consumo de memoria
Cuanta más memoria tenga, mejor; ya que se utiliza para el pre-almacenaje en todos los niveles (sistema de archivos, base de datos y Weblate). Para cientos de componentes de traducción, al menos se recomiendan 4 GB de RAM.
Consejo
Para sistemas con menos memoria que la recomendada, Single-process Celery setup es recomendada.
Empleo de CPU
Muchos usuarios concurrentes incremente la cantidad de núcleos de CPU necesarios.
Uso de almacenaje
El almacenaje de base de datos típica es de alrededor de 300 MB por 1 millón de palabras hospedadas.
El espacio de almacén necesario para repositorios clonados varía, pero Weblate intenta mantener su tamaño mínimo haciendo clones llanos.
Nodos
Para sitios de tamaño medio y mínimo (millones de palabras almacenadas), todos los componentes Weblate (consulte Descripción general de la arquitectura) puede ser ejecutado en un único nodo.
Cuando crezca a cientos de millones de palabras hospedadas, es recomendado tener un nodo dedicado para base de datos (consulte Configuración de base de datos para Weblate).
Comprobar las firmas de liberación
La liberación Weblate están firmadas cifradamente utilizando Firmas de sigsote. Las firmas están adjuntadas a la liberación GitHub.
La verificación puede ser realizada utilizando sigstore package. El siguiente ejemplo verifica firma de la liberación 5.4:
sigstore verify github \
   --cert-identity https://github.com/WeblateOrg/weblate/.github/workflows/setup.yml@refs/tags/weblate-5.4 \
   --bundle Weblate-5.4-py3-none-any.whl.sigstore \
   Weblate-5.4-py3-none-any.whl
Permisos del sistema de archivos
El proceso Weblate necesita poder leer y escribir en el directorio donde guarda los datos - DATA_DIR. Todos los archivos dentro de este directorio deben ser propiedad del usuario que ejecuta todos los procesos Weblate (normalmente WSGI y Celery, consulte Ejecutar servidor y Tareas en segundo plano con Celery).
La configuración por defecto los coloca en el mismo árbol que las fuentes de Weblate, sin embargo puede que prefieras moverlos a una ubicación mejor como: /var/lib/weblate.
Weblate intenta crear estos directorios automáticamente, pero fallará cuando no tiene permisos para hacer tal.
También debe tener cuidado al ejecutar Órdenes de gestión, ya que deben ejecutarse con el mismo usuario con el que se ejecuta Weblate, de lo contrario los permisos de algunos archivos podrían ser incorrectos.
En el contenedor Docker, todos los archivos en el volumen /app/data tienen que ser propiedad del usuario weblate dentro del contenedor (UID 1000).
Ver también
Configuración de base de datos para Weblate
Es recomendable ejecutar Weblate con un servidor de bases de datos PostgreSQL.
PostgreSQL 13 y posterior está mantenida. PostgresSQL 15 o más nueva está recomendada.
MySQL y MariaDB está mantenida, pero no recomendada para instalaciones nuevas.
Nota
Ningunos otros servidores de base de datos mantenidos, pero mantiene a otras bases de datos mantenidas por Django serían posible de implementar.
Ver también
Utilice un motor potente de base de datos, Databases, Migrating from other databases to PostgreSQL
Conexiones de base de datos
En la configuración por defecto, cada proceso de Weblate mantiene una conexión persistente con la base de datos. Las conexiones persistentes mejoran la capacidad de respuesta de Weblate, pero pueden requerir más recursos para el servidor de la base de datos. Por favor, consulte CONN_MAX_AGE y Persistent connections para más información.
Weblate necesita al menos el siguiente número de conexiones:
\((4 \mathit{nCPUs}) + 2\) para procesos Celery
\(\mathit{nCPUs} + 1\) para empleados WSGI
Esto aplica al contenedor Docker por defecto y configuraciones de ejemplo proporcionadas dentro de este documentación, pero los números cambiarán su personalización de cantidad de trabajadores WSGI o ajuste paralelismo de Celery.
El límite actual para el número de conexiones de base de datos necesarias para ser más alta para cuenta siguientes estas situaciones:
Órdenes de gestión necesita su conexión también.
Si el proceso case es eliminado (por ejemplo por OOM killer), puede bloquear la conexión existente hasta que se agote el tiempo de espera.
PostgreSQL
PostgreSQL usualmente es la mejor elección para sitios basados en Django. Es la base de datos de referencia utilizada para implementar capa de base de datos de Django.
Nota
Weblate utiliza extensión trigrama la cual tiene que ser instalada separadamente en algunos casos. Busque postgresql-contrib o un paquete nombrado similar.
Ver también
Crear una base de datos en PostgreSQL
Suele ser una buena idea ejecutar Weblate en su propia base de datos, en una cuenta de usuario separada:
# If PostgreSQL was not installed before, set the main password
sudo -u postgres psql postgres -c "\password postgres"

# Create a database user called "weblate"
sudo -u postgres createuser --superuser --pwprompt weblate

# Create the database "weblate" owned by "weblate"
sudo -u postgres createdb -E UTF8 -O weblate weblate
Consejo
Si no quiere hacer el usuario Weblate un superusuario en PostgreSQL, puede omitir eso. En ese caso tendrá que realizar alguno de los pasos de migración manualmente como un superusuario PostgreSQL en esquema Weblate utilizará:
CREATE EXTENSION IF NOT EXISTS pg_trgm;
CREATE EXTENSION IF NOT EXISTS btree_gin;
Configurar Weblate para que utilice PostgreSQL
El snippet settings.py para PostgreSQL:
DATABASES = {
    "default": {
        # Database engine
        "ENGINE": "django.db.backends.postgresql",
        # Database name
        "NAME": "weblate",
        # Database user
        "USER": "weblate",
        # Configures name of the PostgreSQL role to alter during the database migration
        # "ALTER_ROLE": "weblate",
        # Database password
        "PASSWORD": "password",
        # Set to empty string for localhost
        "HOST": "database.example.com",
        # Set to empty string for default
        "PORT": "",
        # Persistent connections
        "CONN_MAX_AGE": None,
        "CONN_HEALTH_CHECKS": True,
    }
}
La migración de la base de datos ejecuta ALTER ROLE en el rol de base de datos que utiliza Weblate. En la mayoría de los casos, el nombre del rol coincide con el nombre de usuario. En configuraciones más complejas, el nombre del rol es diferente del nombre de usuario, y se obtendrá un error sobre un rol inexistente durante la migración de la base de datos (psycopg2.errors.UndefinedObject: role "weblate@hostname" no existe). Esto es común con Azure Database for PostgreSQL, pero no se limita a este entorno. Configure ALTER_ROLE para cambiar el nombre del rol que Weblate debe modificar durante la migración de la base de datos.
Ver también
MySQL y MariaDB
Advertencia
Si bien Weblate mantiene la compatibilidad con MySQL y MariaDB, nos centramos principalmente en PostgreSQL. Se recomienda usar PostgreSQL para nuevas instalaciones y, para migrar las instalaciones existentes a PostgreSQL, consulte Migrating from other databases to PostgreSQL.
Algunas características Weblate realizarán mejor con PostgreSQL. Esto incluye la búsqueda y la memoria de traducción, que utilizan funciones de texto completo en la base de datos y la implementación de PostgreSQL es superior.
Weblate también se puede usar con MySQL o MariaDB. Consulte MySQL notes y MariaDB notes para conocer las advertencias al usar Django con ellos. Debido a las limitaciones, se recomienda usar PostgreSQL para nuevas instalaciones.
Weblate requiere MySQL de al menos 8 o MariaDB de al menos 10.5.
Se recomienda la configuración siguiente para Weblate:
Utilice el conjunto de caracteres
utf8mb4para permitir la representación de los planos superiores de Unicode (donde se encuentran, por ejemplo, los emojis).Configure el servidor con
innodb_large_prefixpara permitir índices más largos en campos de texto.Fije el nivel de aislamiento a
READ COMMITTED.El modo SQL sería fijado a
STRICT_TRANS_TABLES.
MySQL 8.x, MariaDB 10.5.x o más nuevas tienen configuración por defecto razonable tal que ningún servidor configurando sería necesaria y todo lo que es necesario puede ser configurado sobre el lado del cliente.
El siguiente es un /etc/my.cnf.d/server.cnf de ejemplo para un servidor con 8 GB de RAM. Esta configuración debería bastar en la mayoría de las instalaciones. MySQL y MariaDB poseen configuraciones que optimizarán el rendimiento de su servidor, las cuales no es necesario ajustar a menos que espere tener cantidades elevadas de usuarios accediendo al sistema en simultáneo. Consulte la documentación del proveedor de su base de datos para obtener más información al respecto.
Es absolutamente fundamental para reducir problemas durante la instalación que la configuración innodb_file_per_table esté configurada correctamente y que MySQL/MariaDB se reinicie antes de comenzar la instalación de Weblate.
[mysqld]
character-set-server = utf8mb4
character-set-client = utf8mb4
collation-server = utf8mb4_unicode_ci

datadir=/var/lib/mysql

log-error=/var/log/mariadb/mariadb.log

innodb_large_prefix=1
innodb_file_format=Barracuda
innodb_file_per_table=1
innodb_buffer_pool_size=2G
sql_mode=STRICT_TRANS_TABLES
Consejo
En caso de que aparezca el error #1071 - La clave especificada era demasiado larga; la longitud máxima de la clave es 767 bytes, actualice su configuración para incluir las configuraciones innodb anteriores y reinicie su instalación.
Consejo
En caso de que recibas el error #2006 - El servidor MySQL se ha ido, configurar CONN_MAX_AGE podría ayudar.
Ver también
Configuración de Weblate para utilizar MySQL/MariaDB
El retal settings.py para MySQL y MariaDB:
DATABASES = {
    "default": {
        # Database engine
        "ENGINE": "django.db.backends.mysql",
        # Database name
        "NAME": "weblate",
        # Database user
        "USER": "weblate",
        # Database password
        "PASSWORD": "password",
        # Set to empty string for localhost
        "HOST": "127.0.0.1",
        # Set to empty string for default
        "PORT": "3306",
        # In case you wish to use additional
        # connection options
        "OPTIONS": {},
    }
}
Además crearía la cuenta de usuario weblate en MySQL o MariaBD antes de comenzar la instalación. Utilice las instrucciones a continuación para lograr eso:
GRANT ALL ON weblate.* to 'weblate'@'localhost' IDENTIFIED BY 'password';
FLUSH PRIVILEGES;
Ver también
Otras configuraciones
Configurar el correo electrónico saliente
Weblate envía correos electrónicos en diversas ocasiones: para la activación de cuentas y para diversas notificaciones configuradas por los usuarios. Para ello, necesita acceso a un servidor SMTP.
La configuración del servidor de correo está configurado utilizando estos parámetros: EMAIL_HOST, EMAIL_HOST_PASSWORD, EMAIL_USE_TLS, EMAIL_USE_SSL, EMAIL_HOST_USER y EMAIL_PORT. Sus nombres son explicativos para sí, pero puede encontrar más información en la documentación de Django.
Consejo
En caso de que reciba un error sobre autenticación no compatible (por ejemplo SMTP AUTH extension not supported by server), lo más probable es que se deba a una conexión insegura y el servidor se niega a autenticarse de esta manera. Intente habilitar EMAIL_USE_TLS en tal caso.
Ejecutar en proxy reverso
Varias funciones de Weblate dependen de que se transmitan correctamente los encabezados HTTP. Al usar un proxy inverso, asegúrese de que la información necesaria se transmita correctamente.
- Dirección IP Cliente
Esto es necesario para Rate limiting, Spam protection, o Registro de auditoría.
Weblate analiza la dirección IP desde
REMOTE_ADDR, definida por el controlador WSGI. Esta dirección puede estar vacía (al usar un socket para WSGI) o contener una dirección de proxy inverso, por lo que Weblate necesita un encabezado HTTP adicional con la dirección IP del cliente.Habilitar
IP_BEHIND_REVERSE_PROXYdebería ser suficiente para las configuraciones más habituales, pero es posible que también necesite ajustarIP_PROXY_HEADERyIP_PROXY_OFFSET(empleeWEBLATE_IP_PROXY_HEADERyWEBLATE_IP_PROXY_OFFSETen el contenedor Docker).Consejo
Esta configuración no se puede activar de forma predeterminada, porque permitiría la falsificación de direcciones IP en instalaciones que no tienen un proxy inverso configurado correctamente.
- Nombre de huésped del servidor
La cabecera Host debe coincidir con lo que esté configurado como
SITE_DOMAIN. Puede ser necesaria una configuración adicional en su proxy inverso (por ejemplo, utiliceProxyPreserveHost Onpara Apache oproxy_set_header Host $host;con nginx).- Protocolo del cliente
No pasar el protocolo correcto puede hacer que Weblate termine en un bucle de redirección intentando actualizar el cliente a HTTPS. Asegúrese de que el proxy inverso lo expone correctamente como X-Forwarded-Proto.
Ver también
SSL terminating proxy,
Spam protection,
Rate limiting,
Registro de auditoría,
Muestra de configuración para NGINX y uWSGI,
Configuración de muestra para NGINX y Gunicorn,
Sample configuration for Apache,
Sample configuration for Apache and Gunicorn,
IP_BEHIND_REVERSE_PROXY,
IP_PROXY_HEADER,
IP_PROXY_OFFSET,
SECURE_PROXY_SSL_HEADER,
WEBLATE_IP_PROXY_HEADER,
WEBLATE_IP_PROXY_OFFSET
Proxy HTTP
Weblate ejecuta comandos VCS y estos aceptan la configuración del proxy desde el entorno. Se recomienda definir la configuración del proxy en settings.py:
import os

os.environ["http_proxy"] = "http://proxy.example.com:8080"
os.environ["HTTPS_PROXY"] = "http://proxy.example.com:8080"
Ver también
Ajustar configuración
Ver también
Copia weblate/settings_example.py a weblate/settings.py y ajústalo para que coincida con tu configuración. Probablemente quieras ajustar las siguientes opciones:
ADMINS
Lista de administradores del sitio que recibirán notificaciones cuando algo salga mal, por ejemplo, notificaciones sobre fusiones fallidas o errores de Django.
El formulario de contacto también envía correos electrónicos a estos, a menos que se configure
ADMINS_CONTACT.Ver también
ALLOWED_HOSTS
Debe configurar esto para que enumere los host a los que su sitio debe prestar servicio. Por ejemplo:
ALLOWED_HOSTS = ["demo.weblate.org"]Alternativamente puedes incluir un comodín:
ALLOWED_HOSTS = ["*"]
SESSION_ENGINE
Configure cómo se almacenarán sus sesiones. En caso de que mantenga el motor de backend de base de datos predeterminado, debe programar: weblate clearsessions para eliminar los datos de sesión obsoletos de la base de datos.
Si está utilizando Redis como caché (véase Activar caché) se recomienda utilizarlo también para las sesiones:
SESSION_ENGINE = "django.contrib.sessions.backends.cache"Ver también
DATABASES
Conectividad al servidor de base de datos, por favor revise la documentación de Django para más detalles.
Ver también
Configuración de base de datos para Weblate,
DATABASES, Databases
DEBUG
Disable this for any production server. With debug mode enabled, Django will show backtraces in case of error to users, when you disable it, errors will be sent per e-mail to
ADMINS(see above).Modo depurar además ralentiza Weblate, como Django almacena mucha más información internamente en este caso.
Ver también
DEFAULT_FROM_EMAIL
Dirección de remite de correo-e para salida de correo-e, por ejemplo correos-e de registro.
Ver también
SECRET_KEY
Clave utilizada por Django para firmar alguna información en galletas, consulte Clave secreta de Django para más información.
Ver también
SERVER_EMAIL
Correo electrónico utilizado como dirección de remitente para enviar correos electrónicos al administrador, por ejemplo notificaciones sobre fusiones fallidas.
Ver también
Rellenar la base de datos
Una vez que su configuración esté lista, puede ejecutar migrate para crear la estructura de la base de datos. Ahora debería ser capaz de crear proyectos de traducción utilizando la interfaz de administración.
Una vez que haya terminado, también debe comprobar el Informe de rendimiento en la interfaz de administración, que le dará pistas de configuración no óptima potencial en su página.
Ver también
Puesta en marcha de entorno de producción
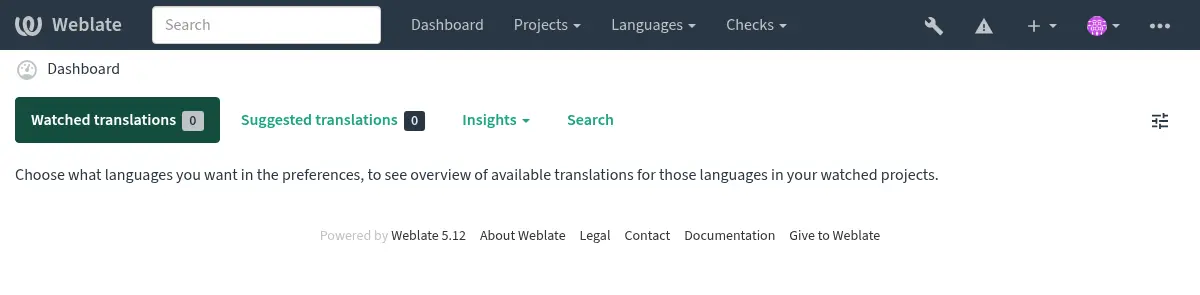
Para una configuración de producción debe realizar los ajustes descritos en las siguientes secciones. Los ajustes más críticos activarán una advertencia, que se indica con un signo de exclamación en la barra superior si se ha iniciado sesión como superusuario:
También se recomienda inspeccionar las comprobaciones lanzadas por Django (aunque puede que no necesites arreglarlas todas):
weblate check --deploy
You can also review the very same checklist at Reporte de rendimiento in the Interfaz de administración.
Ver también
Desactivar el modo de depuración
Ejecute esto para desactivar el modo de depuración (DEBUG) de Django:
DEBUG = False
Con el modo de depuración activado, Django almacena todas las consultas ejecutadas y muestra a los usuarios el seguimiento regresivo de los errores, lo cual no es deseable en un entorno de producción.
Ver también
Properly configure admins
Set the correct admin addresses to the ADMINS setting to defining who will receive
e-mails in case something goes wrong on the server, for example:
ADMINS = (("Your Name", "your_email@example.com"),)
Ver también
Set correct site domain
Adjust site name and domain in the admin interface, otherwise links in RSS or
registration e-mails will not work. This is configured using
SITE_DOMAIN which should contain site domain name.
Distinto en la versión 4.2: Prior to the 4.2 release the Django sites framework was used instead, please see The «sites» framework.
Correctly configure HTTPS
It is strongly recommended to run Weblate using the encrypted HTTPS protocol.
After enabling it, you should set ENABLE_HTTPS in the settings:
ENABLE_HTTPS = True
Consejo
You might want to set up HSTS as well, see SSL/HTTPS for more details.
Set properly SECURE_HSTS_SECONDS
If your site is served over SSL, you have to consider setting a value for SECURE_HSTS_SECONDS
in the settings.py to enable HTTP Strict Transport Security.
By default it’s set to 0 as shown below.
SECURE_HSTS_SECONDS = 0
If set to a non-zero integer value, the django.middleware.security.SecurityMiddleware
sets the HTTP Strict Transport Security header on all responses that do not already have it.
Advertencia
Configurar esto incorrectamente puede romper irreversiblemente (durante algún tiempo) su sitio. Lea primero la documentación HTTP Strict Transport Security.
Utilice un motor potente de base de datos
Utilice PostgreSQL para un entorno de producción, consulte Configuración de base de datos para Weblate para más información.
Utilice lugar adjunto para ejecutar el servidor de base de datos, en otro caso el rendimiento de la red o fiabilidad quizá arruine su experiencia de Weblate.
Compruebe el rendimiento del servidor de la base de datos o ajuste su configuración, p.ej. utilizando PGTune.
Activar caché
Si es posible, utilice Redis desde Django ajustando la variable de configuración CACHES, por ejemplo:
CACHES = {
    "default": {
        "BACKEND": "django_redis.cache.RedisCache",
        "LOCATION": "redis://127.0.0.1:6379/0",
        # If redis is running on same host as Weblate, you might
        # want to use unix sockets instead:
        # 'LOCATION': 'unix:///var/run/redis/redis.sock?db=0',
        "OPTIONS": {
            "CLIENT_CLASS": "django_redis.client.DefaultClient",
            "PARSER_CLASS": "redis.connection.HiredisParser",
        },
    }
}
Consejo
En caso que cambie parámetros Redis para la caché, quizá necesite ajustarlos para Celery también, consulte Tareas en segundo plano con Celery.
Ver también
Caché de avatars
En adición a cacheo de Django, Weblate realiza cacheo de avatares. Está recomendado para utilizar un separado, caché de archivo-respaldado para este propósito:
CACHES = {
    "default": {
        # Default caching backend setup, see above
        "BACKEND": "django_redis.cache.RedisCache",
        "LOCATION": "unix:///var/run/redis/redis.sock?db=0",
        "OPTIONS": {
            "CLIENT_CLASS": "django_redis.client.DefaultClient",
            "PARSER_CLASS": "redis.connection.HiredisParser",
        },
    },
    "avatar": {
        "BACKEND": "django.core.cache.backends.filebased.FileBasedCache",
        "LOCATION": os.path.join(DATA_DIR, "avatar-cache"),
        "TIMEOUT": 604800,
        "OPTIONS": {
            "MAX_ENTRIES": 1000,
        },
    },
}
Ver también
ENABLE_AVATARS,
AVATAR_URL_PREFIX,
Avatars,
Activar caché,
Django’s cache framework
Configure envío de correo-e
Weblate needs to send out e-mails on several occasions, and these e-mails should
have a correct sender address, please configure SERVER_EMAIL and
DEFAULT_FROM_EMAIL to match your environment, for example:
SERVER_EMAIL = "admin@example.org"
DEFAULT_FROM_EMAIL = "weblate@example.org"
Nota
Para desactivar el envío de correo-e por Weblate establezca EMAIL_BACKEND a django.core.mail.backends.dummy.EmailBackend.
Esto desactivará todas las entregas de correo-e incluyendo registración o correos-e de restauración de contraseña.
Configuración de huéspedes permitidos
Django requires ALLOWED_HOSTS to hold a list of domain names
your site is allowed to serve, leaving it empty will block any requests.
In case this is not configured to match your HTTP server, you will get errors
like Invalid HTTP_HOST header: '1.1.1.1'. You may need to add '1.1.1.1'
to ALLOWED_HOSTS.
Consejo
On Docker container, this is available as WEBLATE_ALLOWED_HOSTS.
Ver también
ALLOWED_HOSTS,
WEBLATE_ALLOWED_HOSTS,
Set correct site domain
Clave secreta de Django
The SECRET_KEY setting is used by Django to sign cookies, and you should
really generate your own value rather than using the one from the example setup.
You can generate a new key using weblate-generate-secret-key shipped with Weblate.
Ver también
Efectuar tareas de mantenimiento
For optimal performance, it is good idea to run some maintenance tasks in the background. This is automatically done by Tareas en segundo plano con Celery and covers following tasks:
Configuration health check (hourly).
Efectuar los cambios pendientes (horariamente), consulte Consignas diferidas y
commit_pending.Actualizar alertas de componente (diariamente).
Actualice ramas remotas (todas las noches), consulte
AUTO_UPDATE.Respaldar memoria de traducción a JSON (diariamente), consulte
dump_memory.Tareas de mantenimiento de base de datos y texto completo (tareas diarias y semanalmente), consulte
cleanuptrans.
Sistemas locales y codificación
The system locales should be configured to UTF-8 capable ones. On most Linux distributions this is the default setting. In case it is not the case on your system, please change locales to UTF-8 variant.
For example by editing /etc/default/locale and setting there
LANG="C.UTF-8".
In some cases the individual services have separate configuration for locales. This varies between distribution and web servers, so check documentation of your web server packages for that.
Apache on Ubuntu uses /etc/apache2/envvars:
export LANG='en_US.UTF-8'
export LC_ALL='en_US.UTF-8'
Apache on CentOS uses /etc/sysconfig/httpd (or
/opt/rh/httpd24/root/etc/sysconfig/httpd):
LANG='en_US.UTF-8'
Comprimir bienes cliente
Weblate comes with a bunch of JavaScript and CSS files. For performance reasons it is good to compress them before sending to a client. In default configuration this is done on the fly at cost of little overhead. On big installations, it is recommended to enable offline compression mode. This needs to be done in the configuration and the compression has to be triggered on every Weblate upgrade.
The configuration switch is simple by enabling
django.conf.settings.COMPRESS_OFFLINE and configuring
django.conf.settings.COMPRESS_OFFLINE_CONTEXT (the latter is
already included in the example configuration):
COMPRESS_OFFLINE = True
On each deploy you need to compress the files to match current version:
weblate compress
Consejo
La imagen oficial para Docker ya tiene activada esta funcionalidad.
Ver también
Ejecutar servidor
Consejo
En caso de no experimentado con servicios descritos a continuación, al vez desea intentar con Instalar con Docker.
Es necesario contar con varios servicios para ejecutar Weblate. El montaje recomendado consiste de:
Servidor de base de datos (consulte Configuración de base de datos para Weblate)
Servidor de antememoria (consulte Activar caché)
Frontend web server for static files and SSL termination (see Sirviendo archivos estáticos)
Servidor WSGI para el contenido dinámico (consulte Muestra de configuración para NGINX y uWSGI)
Celery para ejecutar las tareas en segundo plano (consulte Tareas en segundo plano con Celery)
Nota
There are some dependencies between the services, for example cache and database should be running when starting up Celery or uwsgi processes.
In most cases, you will run all services on single (virtual) server, but in
case your installation is heavy loaded, you can split up the services. The only
limitation on this is that Celery and Wsgi servers need access to
DATA_DIR.
Nota
El proceso WSGI tiene que ser ejecutado bajo el mismo usuario que el proceso Celery, de lo contrario los archivos en el DATA_DIR se almacenarán con propiedad mixta, dando lugar a problemas en tiempo de ejecución.
Además consulte Permisos del sistema de archivos y Tareas en segundo plano con Celery.
Ejecutar servidor web
Running Weblate is not different from running any other Django based program. Django is usually executed as WSGI or fcgi (see examples for different webservers below).
For testing purposes, you can use the built-in web server in Django:
weblate runserver
Advertencia
DO NOT USE THIS SERVER IN A PRODUCTION SETTING. It has not gone through
security audits or performance tests. See also Django documentation on
runserver.
Consejo
The Django built-in server serves static files only with DEBUG
enabled as it is intended for development only. For production use, please
see WSGI setups in Muestra de configuración para NGINX y uWSGI, Sample configuration for Apache, Sample configuration for Apache and Gunicorn, and
Sirviendo archivos estáticos.
Sirviendo archivos estáticos
Django needs to collect its static files in a single directory. To do so,
execute weblate collectstatic --noinput. This will copy the static
files into a directory specified by the STATIC_ROOT setting (this defaults to
a static directory inside CACHE_DIR).
It is recommended to serve static files directly from your web server, you should use that for the following paths:
/static/Serves static files for Weblate and the admin interface (from defined by
STATIC_ROOT)./media/Used for user media uploads (e.g. screenshots).
/favicon.icoShould be rewritten to rewrite a rule to serve
/static/favicon.ico.
Content security policy
The default Weblate configuration enables weblate.middleware.SecurityMiddleware
middleware which sets security related HTTP headers like Content-Security-Policy
or X-XSS-Protection. These are by default set up to work with Weblate and its
configuration, but this might need customization for your environment.
Ver también
CSP_SCRIPT_SRC,
CSP_IMG_SRC,
CSP_CONNECT_SRC,
CSP_STYLE_SRC,
CSP_FONT_SRC
CSP_FORM_SRC
Configuración de muestra para NGINX y Gunicorn
The following configuration runs Weblate using Gunicorn under the NGINX webserver
(also available as weblate/examples/weblate.nginx.gunicorn.conf):
#
# nginx configuration for Weblate
#
# You will want to change:
#
# - server_name
# - change /home/weblate/weblate-env to location where Weblate virtualenv is placed
# - change /home/weblate/data to match your DATA_DIR
# - change /home/weblate/data/cache to match your CACHE_DIR
# - change python3.12 to match your Python version
# - change weblate user to match your Weblate user
#
server {
    listen 80;
    server_name weblate;
    # Not used
    root /var/www/html;

    location ~ ^/favicon.ico$ {
        # CACHE_DIR/static/favicon.ico
        alias /home/weblate/data/cache/static/favicon.ico;
        expires 30d;
    }

    location /static/ {
        # CACHE_DIR/static/
        alias /home/weblate/data/cache/static/;
        expires 30d;
    }

    location /media/ {
        # DATA_DIR/media/
        alias /home/weblate/data/media/;
        expires 30d;
    }

    location / {
        proxy_set_header X-Forwarded-For $proxy_add_x_forwarded_for;
        proxy_set_header X-Forwarded-Proto $scheme;
        proxy_set_header Host $http_host;
        proxy_pass http://unix:/run/gunicorn.sock;
        proxy_read_timeout 3600;
    }
}
Muestra de configuración para NGINX y uWSGI
To run production webserver, use the WSGI wrapper installed with Weblate (in
virtual env case it is installed as
~/weblate-env/lib/python3.9/site-packages/weblate/wsgi.py). Don’t
forget to set the Python search path to your virtualenv as well (for example
using virtualenv = /home/user/weblate-env in uWSGI).
The following configuration runs Weblate as uWSGI under the NGINX webserver.
Configuration for NGINX (also available as weblate/examples/weblate.nginx.conf):
#
# nginx configuration for Weblate
#
# You will want to change:
#
# - server_name
# - change /home/weblate/weblate-env to location where Weblate virtualenv is placed
# - change /home/weblate/data to match your DATA_DIR
# - change /home/weblate/data/cache to match your CACHE_DIR
# - change python3.12 to match your Python version
# - change weblate user to match your Weblate user
#
server {
    listen 80;
    server_name weblate;
    # Not used
    root /var/www/html;

    location ~ ^/favicon.ico$ {
        # CACHE_DIR/static/favicon.ico
        alias /home/weblate/data/cache/static/favicon.ico;
        expires 30d;
    }

    location /static/ {
        # CACHE_DIR/static/
        alias /home/weblate/data/cache/static/;
        expires 30d;
    }

    location /media/ {
        # DATA_DIR/media/
        alias /home/weblate/data/media/;
        expires 30d;
    }

    location / {
        include uwsgi_params;
        # Needed for long running operations in admin interface
        uwsgi_read_timeout 3600;
        # Adjust based to uwsgi configuration:
        uwsgi_pass unix:///run/uwsgi/app/weblate/socket;
        # uwsgi_pass 127.0.0.1:8080;
    }
}
Configuration for uWSGI (also available as weblate/examples/weblate.uwsgi.ini):
#
# uWSGI configuration for Weblate
#
# You will want to change:
#
# - change /home/weblate/weblate-env to location where Weblate virtualenv is placed
# - change /home/weblate/data to match your DATA_DIR
# - change python3.12 to match your Python version
# - change weblate user to match your Weblate user
#
[uwsgi]
plugins       = python3
master        = true
protocol      = uwsgi
socket        = 127.0.0.1:8080
wsgi-file     = /home/weblate/weblate-env/lib/python3.12/site-packages/weblate/wsgi.py

# Add path to Weblate checkout if you did not install
# Weblate by pip
# python-path   = /path/to/weblate

# In case you're using virtualenv uncomment this:
virtualenv = /home/weblate/weblate-env

# Needed for OAuth/OpenID
buffer-size   = 8192

# Reload when consuming too much of memory
reload-on-rss = 250

# Increase number of workers for heavily loaded sites
workers       = 8

# Enable threads for Sentry error submission
enable-threads = true

# Child processes do not need file descriptors
close-on-exec = true

# Avoid default 0000 umask
umask = 0022

# Run as weblate user
uid = weblate
gid = weblate

# Enable harakiri mode (kill requests after some time)
# harakiri = 3600
# harakiri-verbose = true

# Enable uWSGI stats server
# stats = :1717
# stats-http = true

# Do not log some errors caused by client disconnects
ignore-sigpipe = true
ignore-write-errors = true
disable-write-exception = true
Ver también
Sample configuration for Apache
It is recommended to use prefork MPM when using WSGI with Weblate.
The following configuration runs Weblate as WSGI, you need to have enabled
mod_wsgi (available as weblate/examples/apache.conf):
#
# VirtualHost for Weblate
#
# You will want to change:
#
# - ServerAdmin and ServerName
# - change /home/weblate/weblate-env to location where Weblate virtualenv is placed
# - change /home/weblate/data to match your DATA_DIR
# - change /home/weblate/data/cache to match your CACHE_DIR
# - change python3.12 to match Python version mod-wsgi is compiled for
# - change weblate user to match your Weblate user
#
<VirtualHost *:80>
    ServerAdmin admin@weblate.example.org
    ServerName weblate.example.org

    # CACHE_DIR/static/favicon.ico
    Alias /favicon.ico /home/weblate/data/cache/static/favicon.ico

    # CACHE_DIR/static/
    Alias /static/ /home/weblate/data/cache/static/
    <Directory /home/weblate/data/cache/static/>
        Require all granted
    </Directory>

    # DATA_DIR/media/
    Alias /media/ /home/weblate/data/media/
    <Directory /home/weblate/data/media/>
        Require all granted
    </Directory>

    # Path to your Weblate virtualenv
    WSGIDaemonProcess weblate python-home=/home/weblate/weblate-env user=weblate request-timeout=600
    WSGIProcessGroup weblate
    WSGIApplicationGroup %{GLOBAL}

    WSGIScriptAlias / /home/weblate/weblate-env/lib/python3.12/site-packages/weblate/wsgi.py process-group=weblate
    WSGIPassAuthorization On

    <Directory /home/weblate/weblate-env/lib/python3.12/site-packages/weblate/>
        <Files wsgi.py>
        Require all granted
        </Files>
    </Directory>

</VirtualHost>
Nota
Weblate requires Python 3, so please ensure you are running Python 3
variant of the modwsgi. Usually it is available as a separate package, for
example libapache2-mod-wsgi-py3.
Utilice la versión de Python coincidente para instalar Weblate.
Sample configuration for Apache and Gunicorn
The following configuration runs Weblate in Gunicorn and Apache 2.4
(available as weblate/examples/apache.gunicorn.conf):
#
# VirtualHost for Weblate using gunicorn on localhost:8000
#
# You will want to change:
#
# - ServerAdmin and ServerName
# - change /home/weblate/weblate-env to location where Weblate virtualenv is placed
# - change /home/weblate/data to match your DATA_DIR
# - change /home/weblate/data/cache to match your CACHE_DIR
# - change weblate user to match your Weblate user
#
<VirtualHost *:443>
    ServerAdmin admin@weblate.example.org
    ServerName weblate.example.org

    # CACHE_DIR/static/favicon.ico
    Alias /favicon.ico /home/weblate/data/cache/static/favicon.ico

    # CACHE_DIR/static/
    Alias /static/ /home/weblate/data/cache/static/
    <Directory /home/weblate/data/cache/static/>
        Require all granted
    </Directory>

    # DATA_DIR/media/
    Alias /media/ /home/weblate/data/media/
    <Directory /home/weblate/data/media/>
        Require all granted
    </Directory>

    SSLEngine on
    SSLCertificateFile /etc/apache2/ssl/https_cert.cert
    SSLCertificateKeyFile /etc/apache2/ssl/https_key.pem
    SSLProxyEngine On

    ProxyPass /favicon.ico !
    ProxyPass /static/ !
    ProxyPass /media/ !

    ProxyPass / http://localhost:8000/
    ProxyPassReverse / http://localhost:8000/
    ProxyPreserveHost On
</VirtualHost>
Sample configuration to start Gunicorn
Weblate has wsgi optional dependency (see Dependencias de Python) that will install everything you need to run Gunicorn. When installing Weblate you can specify it as:
uv pip install Weblate[all,wsgi]
Once you have Gunicorn installed, you can run it. This is usually done at the system level. The following examples show starting via systemd:
[Unit]
Description=gunicorn socket

[Socket]
ListenStream=/run/gunicorn.sock

[Install]
WantedBy=sockets.target
[Unit]
Description=gunicorn daemon
Requires=gunicorn.socket
After=network.target

[Service]
User=weblate
Group=weblate
WorkingDirectory=/home/weblate/weblate-env/
Environment="DJANGO_SETTINGS_MODULE=weblate.settings"
ExecStart=/home/weblate/weblate-env/bin/gunicorn \
    --preload \
    --timeout 3600 \
    --graceful-timeout 3600 \
    --worker-class=gthread \
    --workers=2 \
    --threads=16 \
    --bind unix:/run/gunicorn.sock \
    weblate.wsgi:application

[Install]
WantedBy=multi-user.target
Ver también
Running Weblate under path
It is recommended to use prefork MPM when using WSGI with Weblate.
A sample Apache configuration to serve Weblate under /weblate. Again using
mod_wsgi (also available as weblate/examples/apache-path.conf):
# Copyright © Michal Čihař <michal@weblate.org>
#
# SPDX-License-Identifier: GPL-3.0-or-later

#
# VirtualHost for Weblate, running under /weblate path
#
# You will want to change:
#
# - ServerAdmin and ServerName
# - change /home/weblate/weblate-env to location where Weblate virtualenv is placed
# - change /home/weblate/data to match your DATA_DIR
# - change /home/weblate/data/cache to match your CACHE_DIR
# - change python3.12 to match Python version mod-wsgi is compiled for
# - change weblate user to match your Weblate user
#
<VirtualHost *:80>
    ServerAdmin admin@weblate.example.org
    ServerName weblate.example.org

    # CACHE_DIR/static/favicon.ico
    Alias /weblate/favicon.ico /home/weblate/data/cache/static/favicon.ico

    # CACHE_DIR/static/
    Alias /weblate/static/ /home/weblate/data/cache/static/
    <Directory /home/weblate/data/cache/static/>
        Require all granted
    </Directory>

    # DATA_DIR/media/
    Alias /weblate/media/ /home/weblate/data/media/
    <Directory /home/weblate/data/media/>
        Require all granted
    </Directory>

    # Path to your Weblate virtualenv
    WSGIDaemonProcess weblate python-home=/home/weblate/weblate-env user=weblate request-timeout=600
    WSGIProcessGroup weblate
    WSGIApplicationGroup %{GLOBAL}

    WSGIScriptAlias /weblate /home/weblate/weblate-env/lib/python3.12/site-packages/weblate/wsgi.py process-group=weblate
    WSGIPassAuthorization On

    <Directory /home/weblate/weblate-env/lib/python3.12/site-packages/weblate/>
        <Files wsgi.py>
        Require all granted
        </Files>
    </Directory>

</VirtualHost>
Additionally, you will have to adjust weblate/settings.py:
URL_PREFIX = "/weblate"
Tareas en segundo plano con Celery
Weblate uses Celery to execute regular and background tasks. You are supposed to run a Celery service that will execute these. For example, it is responsible for handling following operations (this list is not complete):
Receiving webhooks from external services (see Actuadores de notificación).
Running regular maintenance tasks such as backups, cleanups, daily add-ons, or updates (see Respaldar y trasladar Weblate,
BACKGROUND_TASKS, Complementos).Ejecutando Traducción automática.
Enviar notificaciones con el resumen.
Offloading expensive operations from the WSGI process.
Confirmar los cambios pendientes (ver Consignas diferidas).
A typical setup using Redis as a backend looks like this:
CELERY_TASK_ALWAYS_EAGER = False
CELERY_BROKER_URL = "redis://localhost:6379"
CELERY_RESULT_BACKEND = CELERY_BROKER_URL
Ver también
You should also start the Celery worker to process the tasks and start scheduled tasks, this can be done directly on the command-line (which is mostly useful when debugging or developing):
./weblate/examples/celery start
./weblate/examples/celery stop
Nota
El proceso Celery tiene que ser ejecutado bajo el mismo usuario que el proceso WSGI, de lo contrario los archivos en el DATA_DIR se almacenarán con propiedad mixta, dando lugar a problemas en tiempo de ejecución.
See also Permisos del sistema de archivos and Ejecutar servidor.
Executing Celery tasks in the WSGI using eager mode
Nota
This will have severe performance impact on the web interface, and will break features depending on regular trigger (for example committing pending changes, digest notifications, or backups).
For development, you might want to use eager configuration, which does process all tasks in place:
CELERY_TASK_ALWAYS_EAGER = True
CELERY_BROKER_URL = "memory://"
CELERY_TASK_EAGER_PROPAGATES = True
Running Celery as system service
Most likely you will want to run Celery as a daemon and that is covered by
Daemonization. For the most common Linux setup using
systemd, you can use the example files shipped in the examples folder
listed below.
Systemd unit to be placed as /etc/systemd/system/celery-weblate.service:
[Unit]
Description=Celery Service (Weblate)
After=network.target

[Service]
Type=forking
User=weblate
Group=weblate
EnvironmentFile=/etc/default/celery-weblate
WorkingDirectory=/home/weblate
RuntimeDirectory=celery
RuntimeDirectoryPreserve=restart
LogsDirectory=celery
ExecStart=/bin/sh -c '${CELERY_BIN} multi start ${CELERYD_NODES} \
  -A ${CELERY_APP} --pidfile=${CELERYD_PID_FILE} \
  --logfile=${CELERYD_LOG_FILE} --loglevel=${CELERYD_LOG_LEVEL} ${CELERYD_OPTS}'
ExecStop=/bin/sh -c '${CELERY_BIN} multi stopwait ${CELERYD_NODES} \
  --pidfile=${CELERYD_PID_FILE}'
ExecReload=/bin/sh -c '${CELERY_BIN} multi restart ${CELERYD_NODES} \
  -A ${CELERY_APP} --pidfile=${CELERYD_PID_FILE} \
  --logfile=${CELERYD_LOG_FILE} --loglevel=${CELERYD_LOG_LEVEL} ${CELERYD_OPTS}'

[Install]
WantedBy=multi-user.target
Environment configuration to be placed as /etc/default/celery-weblate:
# Name of nodes to start
CELERYD_NODES="celery notify memory backup translate"

# Absolute or relative path to the 'celery' command:
CELERY_BIN="/home/weblate/weblate-env/bin/celery"

# App instance to use
# comment out this line if you don't use an app
CELERY_APP="weblate.utils"

# Extra command-line arguments to the worker,
# increase concurrency if you get weblate.E019
CELERYD_OPTS="--beat:celery --queues:celery=celery --prefetch-multiplier:celery=4 \
    --queues:notify=notify --prefetch-multiplier:notify=10 \
    --queues:memory=memory --prefetch-multiplier:memory=10 \
    --queues:translate=translate --prefetch-multiplier:translate=4 \
    --concurrency:backup=1 --queues:backup=backup  --prefetch-multiplier:backup=2"

# Logging configuration
# - %n will be replaced with the first part of the nodename.
# - %I will be replaced with the current child process index
#   and is important when using the prefork pool to avoid race conditions.
CELERYD_PID_FILE="/run/celery/weblate-%n.pid"
CELERYD_LOG_FILE="/var/log/celery/weblate-%n%I.log"
CELERYD_LOG_LEVEL="INFO"
Additional configuration to rotate Celery logs using logrotate to be
placed as /etc/logrotate.d/celery:
# Copyright © Michal Čihař <michal@weblate.org>
#
# SPDX-License-Identifier: GPL-3.0-or-later

/var/log/celery/*.log {
        weekly
        missingok
        rotate 12
        compress
        notifempty
}
Periodic tasks using Celery beat
Weblate comes with built-in setup for scheduled tasks. The task schedule is stored in the database and tasks are executed by the Celery beat daemon.
Consejo
You can define additional tasks in settings.py, for example see
Consignas diferidas.
Monitoring Celery status
You can find current length of the Celery task queues in the
Interfaz de administración or you can use celery_queues on the
command-line. In case the queue will get too long, you will also get
configuration error in the admin interface.
Advertencia
The Celery errors are by default only logged into Celery log and are not visible to user. In case you want to have overview on such failures, it is recommended to configure Collecting error reports and monitoring performance.
Single-process Celery setup
In case you have very limited memory, you might want to reduce number of Weblate processes. All Celery tasks can be executed in a single process using:
celery --app=weblate.utils worker --beat --queues=celery,notify,memory,translate,backup --pool=solo
An installation using Docker can be configured to use a single-process Celery setup by setting CELERY_SINGLE_PROCESS.
Advertencia
This will have a noticeable performance impact on Weblate.
Monitorizar Weblate
Weblate provides the /healthz/ URL to be used in simple health checks, for example
using Kubernetes. The Docker container has built-in health check using this URL.
For monitoring metrics of Weblate you can use GET /api/metrics/ API endpoint.
Collecting error reports and monitoring performance
Weblate, as any other software, can fail. In order to collect useful failure states we recommend to use third party services to collect such information. This is especially useful in case of failing Celery tasks, which would otherwise only report error to the logs and you won’t get notified on them. Weblate has support for the following services:
Sentry
Weblate has built-in support for Sentry. To use
it, it’s enough to set SENTRY_DSN in the settings.py:
SENTRY_DSN = "https://id@your.sentry.example.com/"
Sentry can be also used to monitor performance of Weblate by collecting traces
and profiles for defined percentage of operations. This can be configured using
SENTRY_TRACES_SAMPLE_RATE and SENTRY_PROFILES_SAMPLE_RATE.
Ver también
Revertir
Weblate has built-in support for Rollbar. To use it, it’s enough to follow instructions for Rollbar notifier for Python.
In short, you need to adjust settings.py:
# Add rollbar as last middleware:
MIDDLEWARE = [
    # … other middleware classes …
    "rollbar.contrib.django.middleware.RollbarNotifierMiddleware",
]

# Configure client access
ROLLBAR = {
    "access_token": "POST_SERVER_ITEM_ACCESS_TOKEN",
    "environment": "development" if DEBUG else "production",
    "branch": "main",
    "root": "/absolute/path/to/code/root",
}
Everything else is integrated automatically, you will now collect both server and client side errors.
Nota
Error logging also includes exceptions that were gracefully handled, but might indicate a problem - such as failed parsing of an uploaded file.
Graylog log management
Added in version 5.9.
Weblate can be configured to log using the GELF TCP protocol. This was developed for Graylog integration, but can be used with any compliant logging platform.
The configuration boilerplate is included in Configuración de muestra, for
Docker this can be configured using WEBLATE_LOG_GELF_HOST.
Migrating Weblate to another server
Migrating Weblate to another server should be pretty easy, however it stores data in few locations which you should migrate carefully. The best approach is to stop Weblate for the migration.
Migrar base de datos
Depending on your database backend, you might have several options to migrate the database. The most straightforward approach is to use database native tools, as they are usually the most effective (e.g. mysqldump or pg_dump). Alternatively you can use replication in case your database supports it.
Ver también
Migrating between databases described in Migrating from other databases to PostgreSQL.
Migrar repositorios VCS
The VCS repositories stored under DATA_DIR need to be migrated as
well. You can simply copy them or use rsync to do the migration
more effectively.
Otras notas
No olvide trasladar los otros servicios que Weblate esté utilizando, como Redis, las tareas de Cron o los dorsales de autenticación personalizados.