開始為 Weblate 貢獻程式碼
要理解 Weblate 原始碼,請瀏覽 Weblate 原始碼、 Weblate 前端 和 Weblate 內部。
從程式碼庫開始
若要熟悉 Weblate 程式碼庫,可以先嘗試處理標有 good first issue 的問題。
歡迎直接開始處理這些問題,不必事先詢問。只要在問題中留言告知,讓大家知道已有人著手處理即可。
本機執行 Weblate
開始參與 Weblate 開發最方便的方式,是依照 從原始碼中安裝 操作。這會建立含可編輯 Weblate 原始碼的 Python 環境。
複製 Weblate 原始碼:
git clone https://github.com/WeblateOrg/weblate.git
cd weblate
安裝 Weblate 和所有對開發有用的相依套件:
uv sync --all-extras --dev
啟動開發伺服器:
uv run weblate runserver
取決於設定,您也許想啟動 Celery workers:
uv run ./weblate/examples/celery start
若要執行測試(更多細節請參閱 Weblate 的本機測試):
. scripts/test-database.sh
uv run pytest
也參考
在 Docker 中本機執行 Weblate
如果您安裝了 Docker 和 docker-compose-plugin,您還需要透過您喜愛的包管理器安裝名為 jq 的額外工具。之後,只需執行以下指令即可啟動開發環境:
./rundev.sh
它將新增 Docker 影響並啟動它。 Weblate 執行在 <http://127.0.0.1:8080/> 上,並且您可以以 admin 為使用者名稱, admin 為密碼來登入。新的安裝是空的,所以您會想要以 新增翻譯專案和元件 來繼續。
Weblate 已設定為使用 maildev 容器作為電子郵件伺服器。寄送的電子郵件可在 <http://127.0.0.1:1080/> 檢視。
相關的 Dockerfile 與 docker-compose.yml 位於 dev-docker 目錄。為方便開發期間存取資料庫,執行 PostgreSQL 的容器會在 5433 連接埠提供服務。
指令碼還接受一些引數,要執行測試,以 test 引數來執行,然後指定任何 test 引數,例如,只在 weblate.machine 模組中執行測試:
./rundev.sh test --exitfirst weblate/machine
備註
小心在執行測試前您的 Docker 容易活動並執行。您可以通過執行 docker ps 指令來檢查。
展示日誌:
./rundev.sh logs
為了停止背景容器,執行:
./rundev.sh stop
執行沒有任何參數的指令碼將重建 Docker 容器並重啟動它。
警告
此容器不適合正式環境使用。為簡化開發工作,其安全性有所取捨。
引導您的開發執行個體
您可以使用 import_demo 建立示範翻譯,並使用 createadmin 建立管理員使用者。
若也安裝了 帳單,可以使用 billing_demo 建立示範帳務專案。
使用 PyCharm 為 Weblate 編寫程式碼
PyCharm 是 Python 的著名 IDE,這裡有一些幫助您在其中建立您的 Weblate 專案的指導原則。
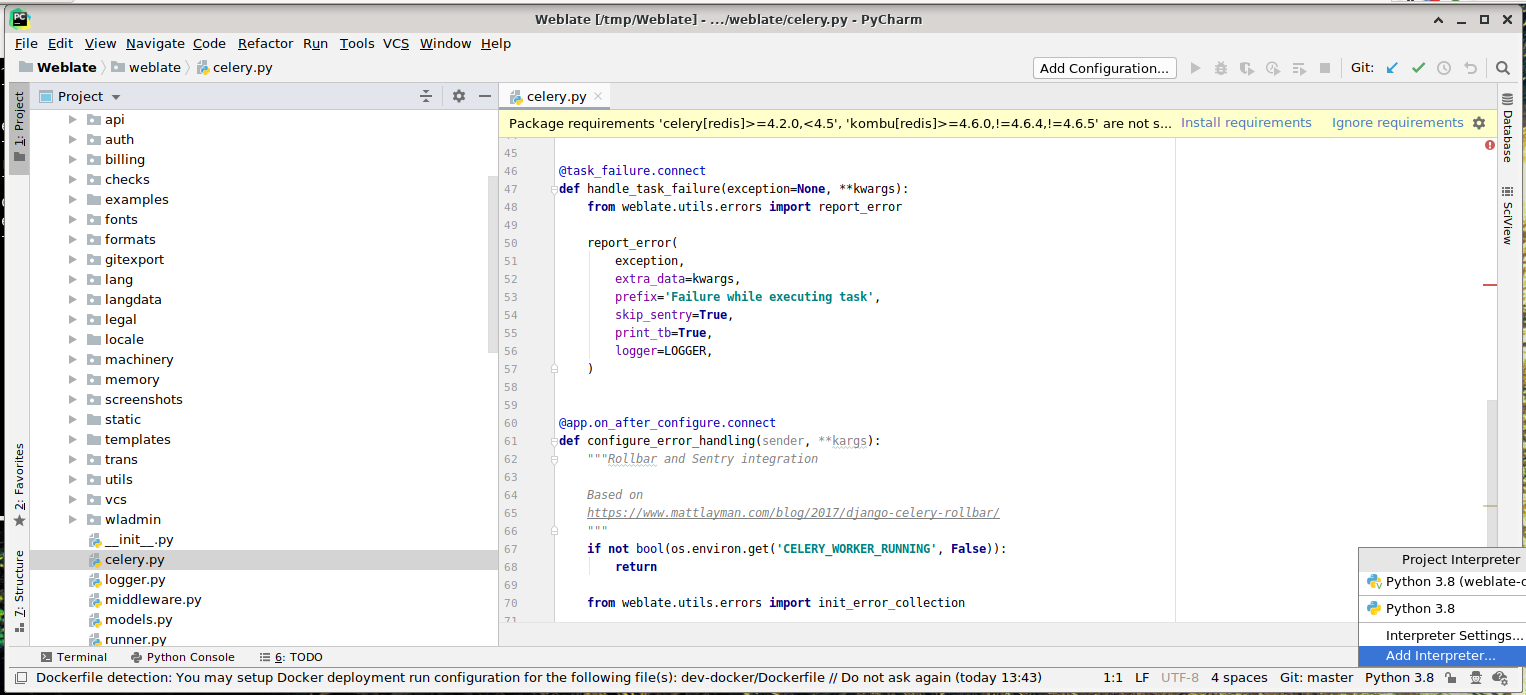
考慮到您剛剛將 GitHub 儲存庫複製到一個資料夾中,只需使用 PyCharm 開啟它。一旦 IDE 開啟,第一步要做的是指定您想要使用的直譯器:
選取由 uv sync --all-extras --dev 建立的 .venv 環境,以符合指令列開發環境的設定。您也可以讓 PyCharm 建立 Python 環境,但建議優先使用 uv 管理的環境:
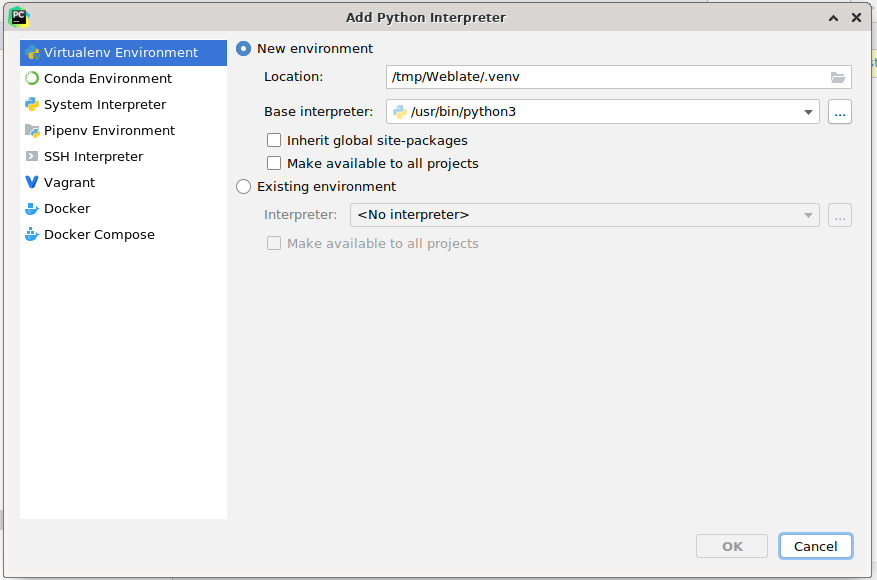
設定直譯器後,別忘了安裝相依套件。使用建議的 uv 管理環境時,請從主控台執行 uv sync --all-extras --dev。
第二步是設定正確的資訊來在 PyCharm 中原生使用 Django:理念是能夠立刻觸發 IDE 中的單元測試。為此,您需要指定該 Django 專案的根路徑及其設定路徑:
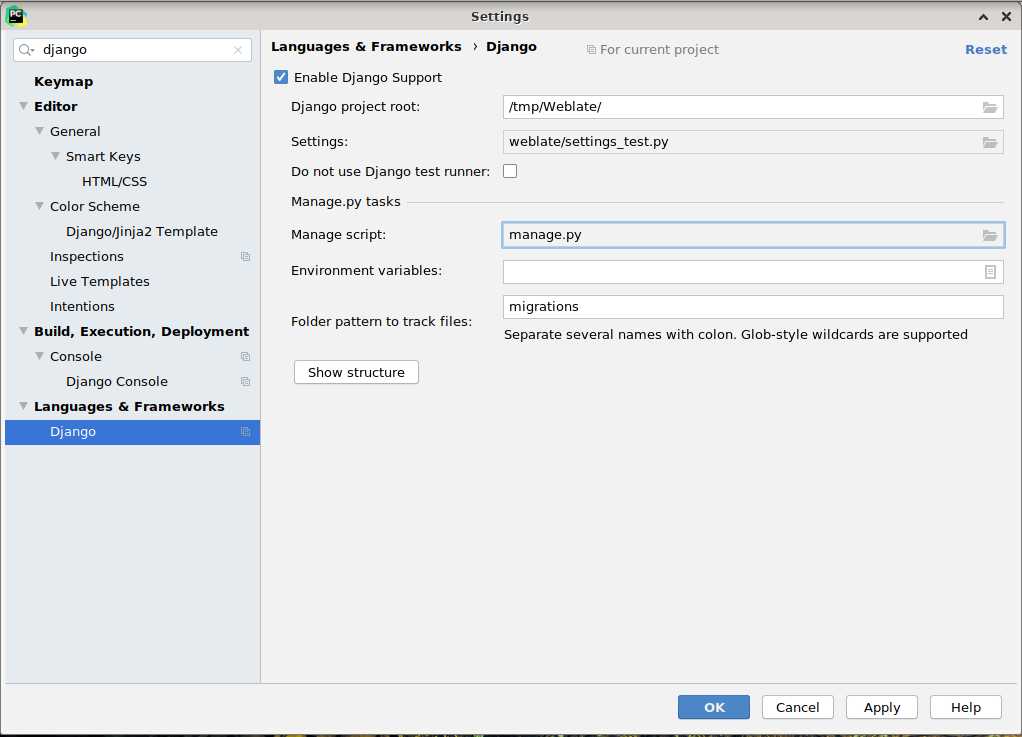
請注意,Django project root 是儲存庫的實際根目錄,而不是 Weblate 子目錄。關於設定,您可以使用儲存庫中的 weblate/settings_test.py,您也可以建立自己的設定並將其設定在那裡。
最後一步是執行伺服器,並將中斷點放置在代碼中而能夠除錯它。這通過新增新的 Django Server 設定來完成:

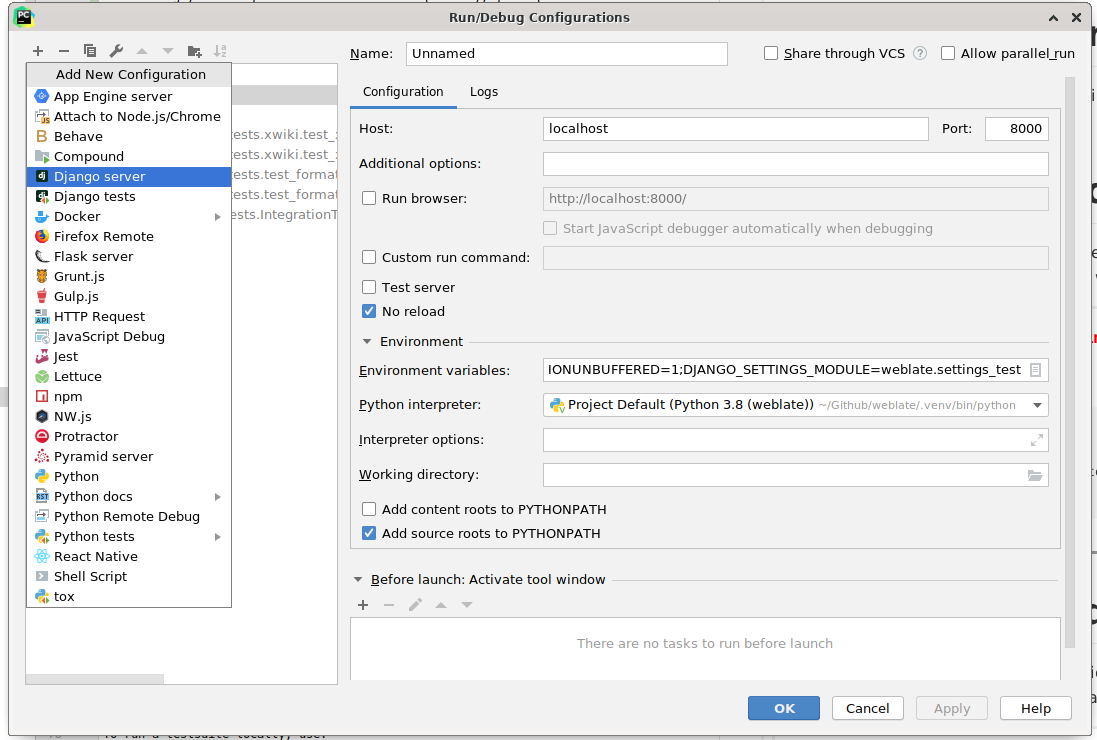
提示
小心被稱為 No reload 的屬性:如果您修改檔案,它會阻止伺服器被實時重新載入。這允許保留現有的除錯器中斷點,而它們通常會在重新載入伺服器時被丟棄。