வலைபெயர்ப்புடிற்கு பங்களிக்கும் குறியீட்டைத் தொடங்குதல்
Understand the Weblate source code by going through வலைபெயர்ப்பு மூலக் குறியீடு, வலைபெயர்ப்பு ஃபிரான்டென்ட் and வலைபெயர்ப்பு internals.
கோட்பேச் தொடங்கி
Familiarize yourself with the Weblate codebase, by having a go at the bugs labelled good first issue.
நீங்கள் கேட்காமல் இந்த பிரச்சினைகளில் வேலை செய்யத் தொடங்குவது வரவேற்கத்தக்கது. அந்த விவகாரத்தில் யாரோ வேலை செய்கிறார்கள் என்பது தெளிவாகும் வகையில் அதை இந்த விவகாரத்தில் அறிவிக்கவும்.
வலைபெயர்ப்பை உள்நாட்டில் இயக்குதல்
The most comfortable approach to get started with Weblate development is to follow மூலங்களிலிருந்து நிறுவுகிறது. It will get you a virtualenv with editable Weblate sources.
வலைபெயர்ப்பு மூல குறியீட்டை நகலி செய்யவும்:
git clone https://github.com/WeblateOrg/weblate.git
cd weblate
ஒரு virtualenv ஐ உருவாக்கு:
uv venv .venv
source .venv/bin/activate
Install Weblate (for this you need some system dependencies, see மூலங்களிலிருந்து நிறுவுகிறது) and all dependencies useful for development:
uv pip install -e '.[dev]'
ஒரு மேம்பாட்டு சேவையகத்தைத் தொடங்கவும்:
weblate runserverஉங்கள் உள்ளமைவைப் பொறுத்து, நீங்கள் செலரி தொழிலாளர்களைத் தொடங்க விரும்பலாம்:
./weblate/examples/celery startTo run a test (see வெப்லேட்டின் உள்ளக சோதனை for more details):
. scripts/test-database.sh
pytest
See also
டாக்கரில் உள்நாட்டில் வலைபெயர்ப்பு இயங்குகிறது
If you have Docker and the docker-compose-plugin installed, you need an additional tool
called jq which you can install through your favorite package manager. Then, you can
spin up the development environment by simply running:
./rundev.sh
It will create a development Docker image and start it. Weblate is running on
<http://127.0.0.1:8080/> and you can sign in as the user admin using admin
as the password. The new installation is empty, so you might want to continue with
மொழிபெயர்ப்பு திட்டங்கள் மற்றும் கூறுகளைச் சேர்ப்பது.
Weblate is configured to use maildev container as a e-mail server. The delivered e-mails can be seen at <http://127.0.0.1:1080/>.
The Dockerfile and docker-compose.yml for this are located in the
dev-docker directory. For easier access to the database during development,
the container running PostgreSQL is exposed on port 5433.
The script also accepts some parameters, to execute tests, run it with the
test parameter and then specify any test parameters,
for example running only tests in the weblate.machine module:
./rundev.sh test --exitfirst weblate/machine
Note
Be careful that your Docker containers are up and running before running the
tests. You can check that by running the docker ps command.
பதிவுகளைக் காண்பிக்க:
./rundev.sh logs
பின்னணி கொள்கலன்களை நிறுத்த, இயக்கவும்:
./rundev.sh stop
வாதங்கள் இல்லாமல் ச்கிரிப்டை இயக்குவது டாக்கர் கொள்கலனை மீண்டும் உருவாக்கி அதை மறுதொடக்கம் செய்யும்.
Warning
இந்த கொள்கலன் விளைவாக்கம் பயன்பாட்டிற்கு ஏற்றதல்ல. வளர்ச்சியை எளிதாக்குவதற்கு பாதுகாப்பு கொடை செய்யப்படுகிறது.
உங்கள் டெவல் நிகழ்வை பூட்ச்டிராப்பிங் செய்வது
You might want to use import_demo to create demo translations and
createadmin to make an admin user.
If you have பட்டியலிடல் installed as well, you can use
billing_demo to create a demo billing project.
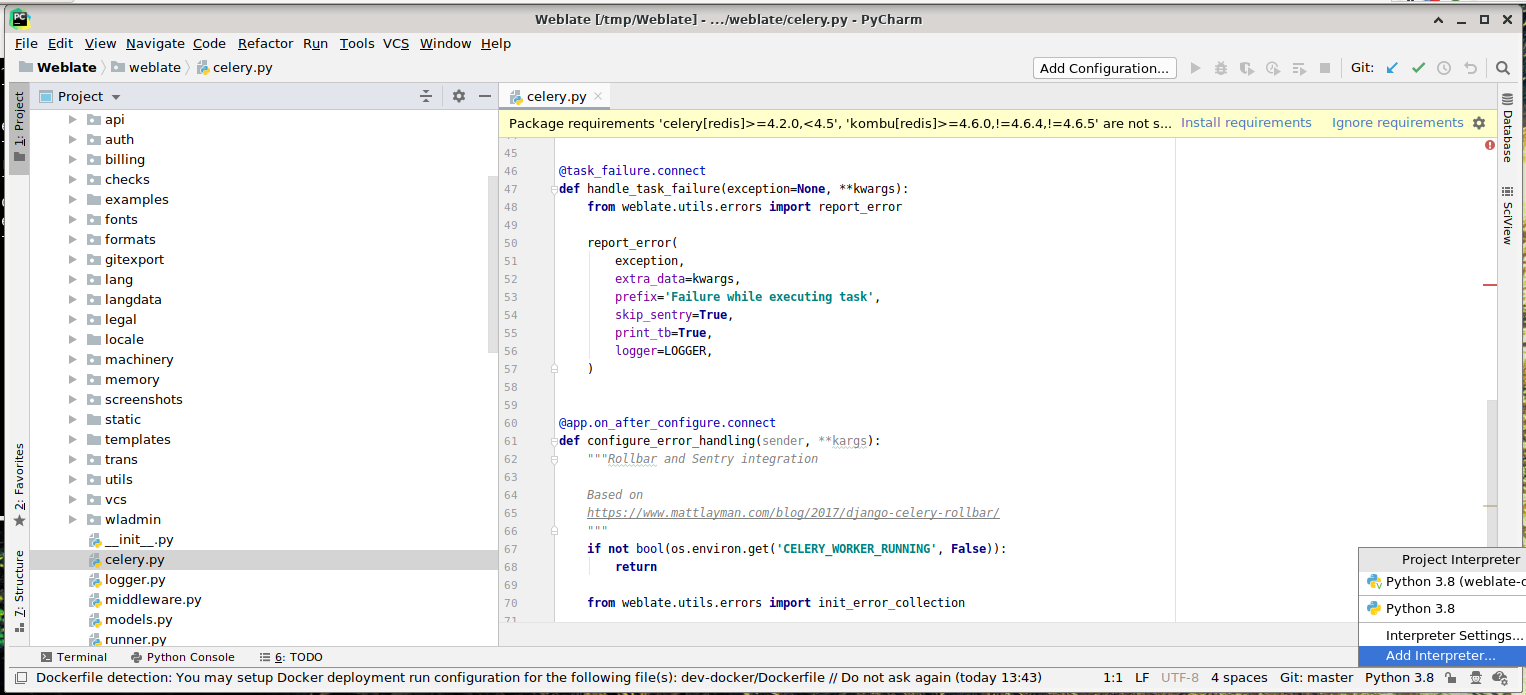
பைசார்ம் உடன் குறியீட்டு வலைபெயர்ப்பு
பைசார்ம் என்பது பைத்தானுக்கு அறியப்பட்ட ஐடிஇ ஆகும், அதில் உங்கள் வலைபெயர்ப்பு திட்டத்தை அமைக்க உதவும் சில வழிகாட்டுதல்கள் இங்கே.
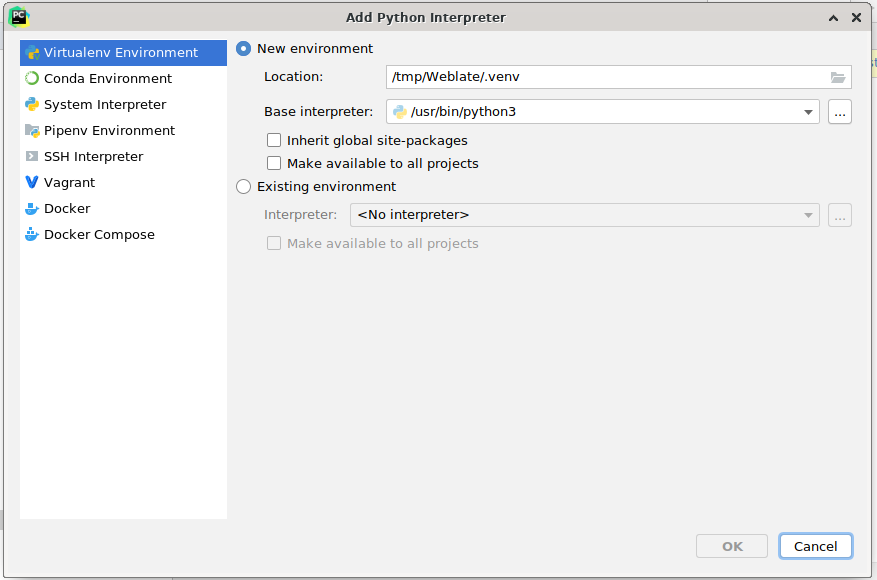
நீங்கள் அறிவிலிமையம் களஞ்சியத்தை ஒரு கோப்புறையில் குளோனிங் செய்துள்ளீர்கள் என்பதைக் கருத்தில் கொண்டு, அதை பைசார்ம் மூலம் திறக்கவும். ஐடிஇ திறந்தவுடன், முதல் படி நீங்கள் பயன்படுத்த விரும்பும் மொழிபெயர்ப்பாளரைக் குறிப்பிட வேண்டும்:
உங்களுக்காக மெய்நிகர்என்வியை உருவாக்க பைசார்ம் அனுமதிக்க நீங்கள் தேர்வு செய்யலாம் அல்லது ஏற்கனவே இருக்கும் ஒன்றைத் தேர்ந்தெடுக்கலாம்:
மொழிபெயர்ப்பாளர் அமைக்கப்பட்டவுடன் சார்புநிலைகளை நிறுவ மறக்காதீர்கள்: கன்சோல் மூலம் (ஐடிஇயிலிருந்து வரும் கன்சோல் உங்கள் மெய்நிகர்களை இயல்புநிலையாக நேரடியாகப் பயன்படுத்தும்), அல்லது காணாமல் போன சார்புகளைப் பற்றிய எச்சரிக்கையைப் பெறும்போது இடைமுகம் மூலம்.
இரண்டாவது படி பைசார்மிற்குள் சாங்கோவைப் பயன்படுத்த சரியான தகவலை அமைப்பது: ஐடிஇயில் அலகு சோதனைகளை உடனடியாகத் தூண்ட முடியும் என்பதே சிந்தனை. அதற்கு நீங்கள் சாங்கோ திட்டத்தின் வேர் பாதை மற்றும் அதன் அமைப்புகளுக்கான பாதையை குறிப்பிட வேண்டும்:
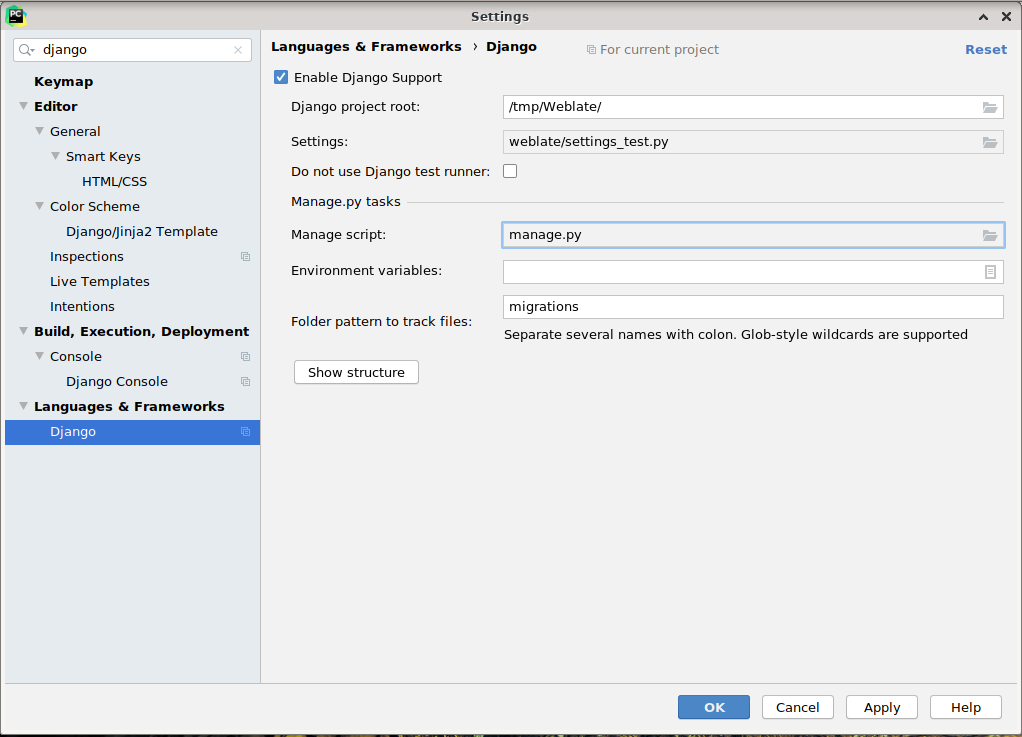
Be careful, the Django project root is the actual root of the repository, not the Weblate
sub-directory. About the settings, you could use the weblate/settings_test.py from the
repository, but you could create your own setting and set it there.
கடைசி படி சேவையகத்தை இயக்குவது மற்றும் அதை பிழைத்திருத்தம் செய்ய குறியீட்டில் பிரேக்பாயிண்ட்களை வைப்பது. இது ஒரு புதிய 'சாங்கோ சர்வர்' உள்ளமைவை உருவாக்குவதன் மூலம் செய்யப்படுகிறது:
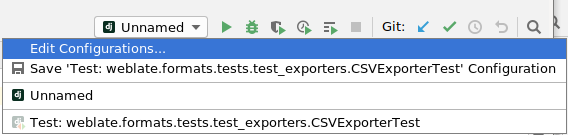
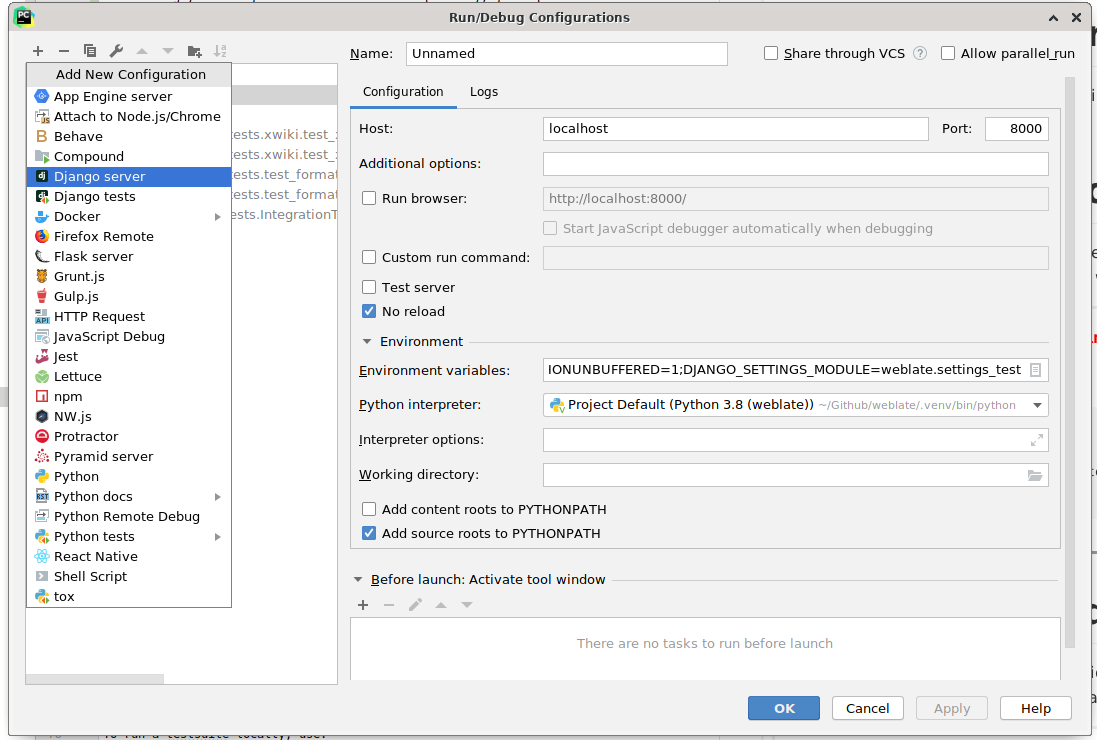
Hint
Be careful with the property called No reload: It prevents the server from being reloaded live if you modify files. This allows the existing debugger breakpoints to persist, when they normally would be discarded upon reloading the server.